This article is the first in the series – ASP.NET Core Security. Here we will see what is ASP.NET Core Identity and how to get started. To understand things better we will explicitly add identity to an existing ASP.NET Core web application.
- ASP.NET Core Identity – Getting Started
- ASP.NET Core Identity Claims-based Authorization
- ASP.NET Core Identity Identity Roles based Authorization
- Implement Cookie Authentication in ASP.NET Core
- Secure Applications with OAuth2 and OpenID Connect in ASP.NET Core 5 – Complete Guide
- Custom Identity User Management in ASP.NET Core – Detailed Guide
Table of Contents
What is Identity?
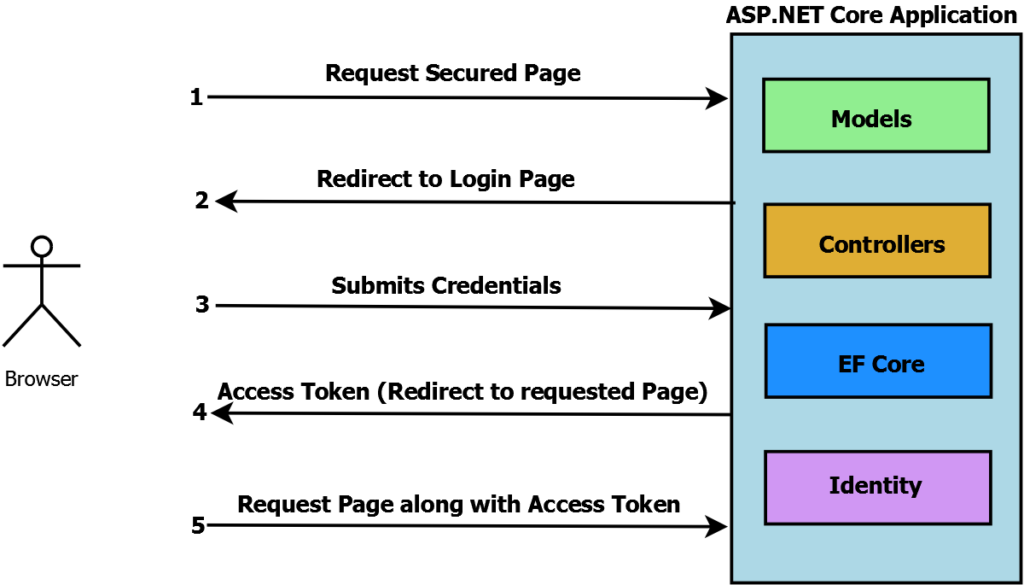
ASP.NET Core Identity is authentication & authorization API and is used to implement security-related features in your ASP.NET Core Applications. ASP.NET Core Identity is a built-in membership system or framework which allows us to implement
- Manage User Accounts
- Authentication & Authorization
- Email confirmation
- Password Recovery
- Two factor Authentication
- External login providers like Microsoft, Google, Facebook etc
Identity source code is available on GitHub. SQL Server is the generally preferred database to store identity-related data like user name, password & user-related data. Alternatively, Azure table storage is also supported.
Implement ASP.NET Core Identity
Sample Application Details
Below is the GitHub link to sample ASP.NET Core Web Application which has been created to implement identity
https://github.com/procodeguide/SampleApp.Blog
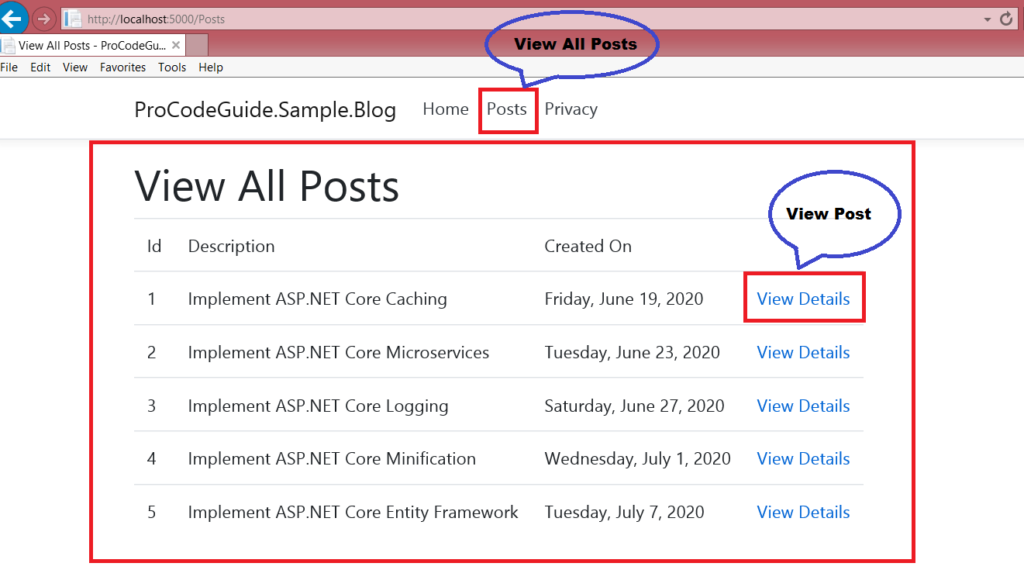
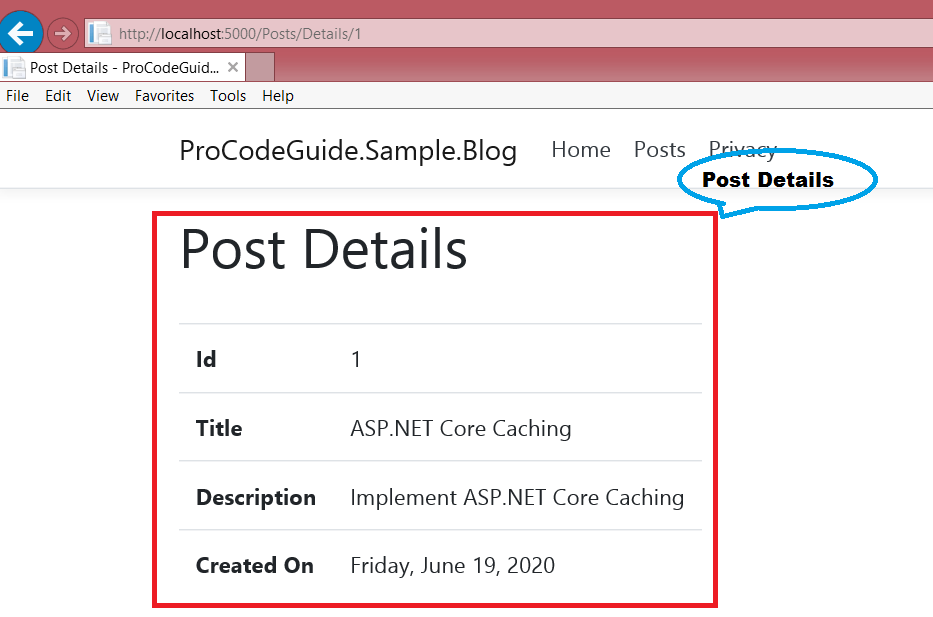
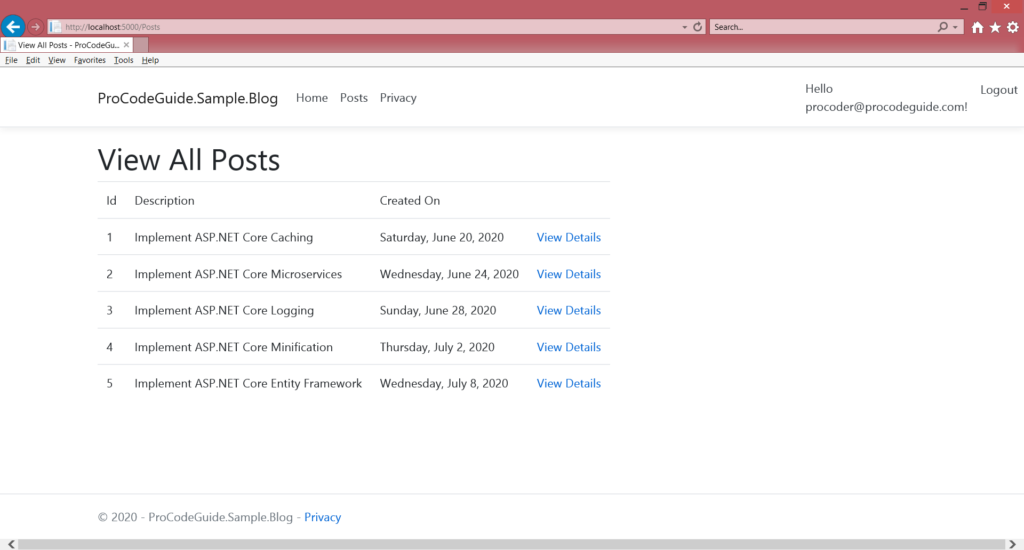
When you download, build & run above visual studio project you can see below mentioned functionality available in application & also anyone can browse the application with no need to provide user credentials.
- View list of posts
- View details of each post
Add Identity to Sample Application
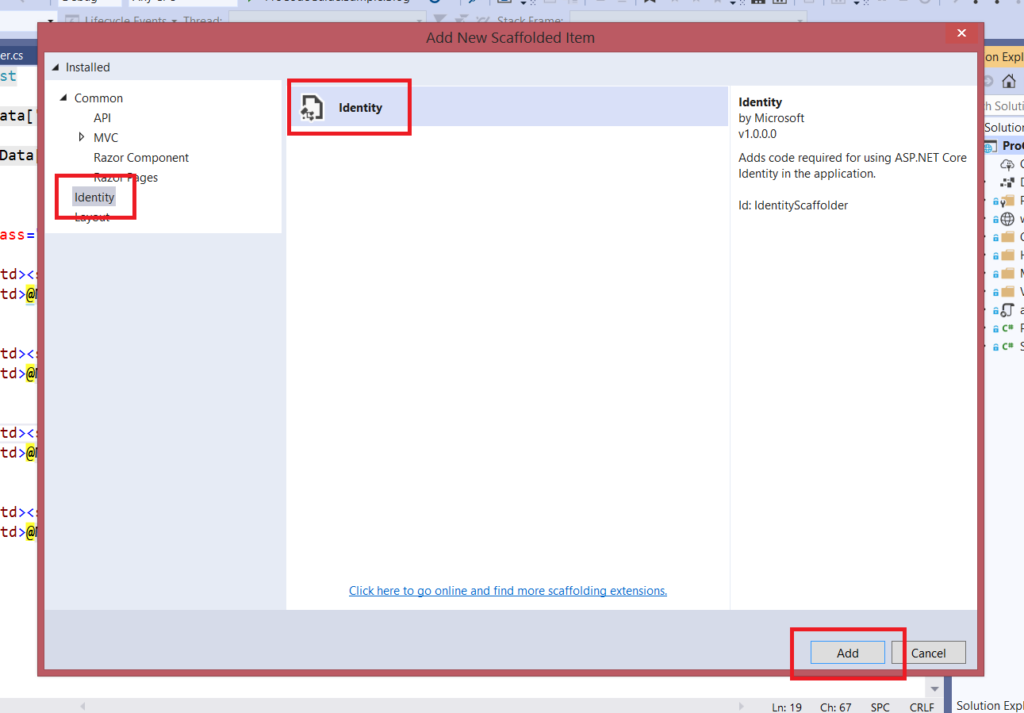
To add identity right click on project in solution explorer and select Add=>New Scaffolded Items from the context menu.
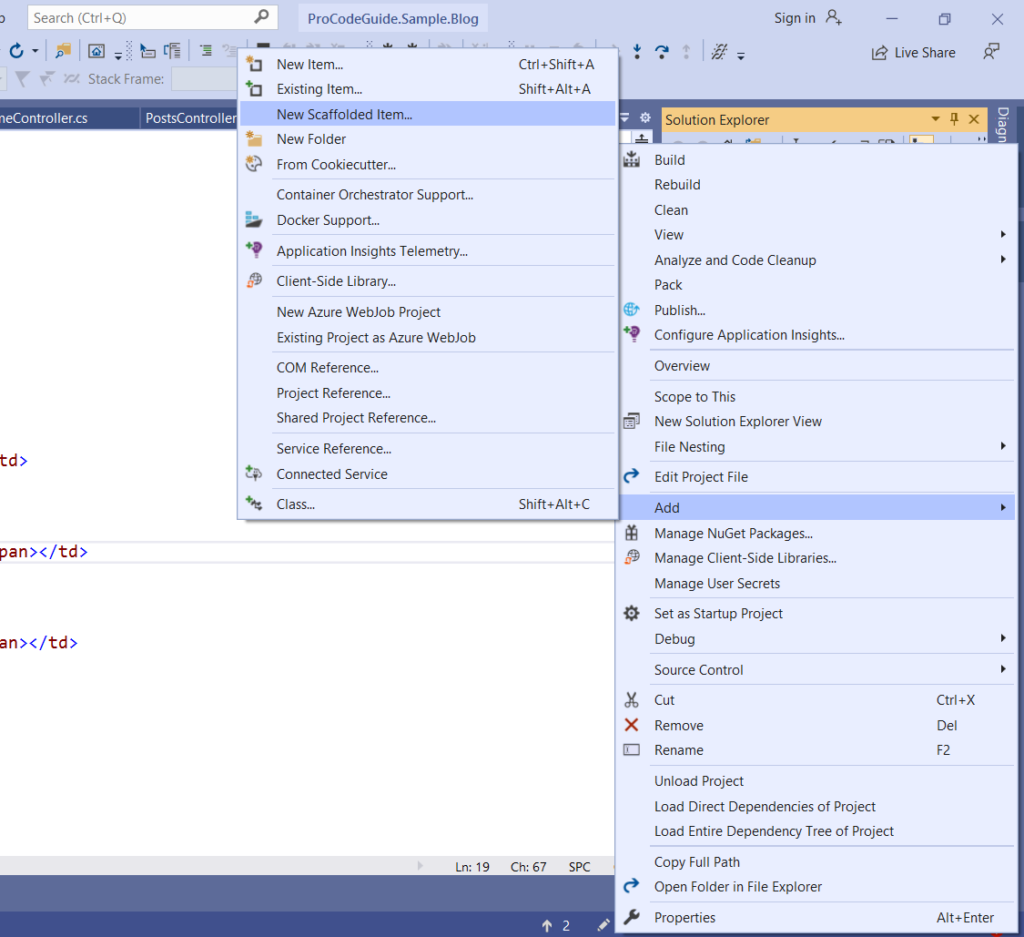
On selecting Add New Scaffolded Item below dialog appears where you need to select Identity under Installed and click on Add Button.
After adding Identity you need to specify few things on the screen below
- Select the layout page from the project files
- Select Login & Logout file to be overridden
- Select Register file
- Add new data context class using + sign button
- Add new User class using + sign button
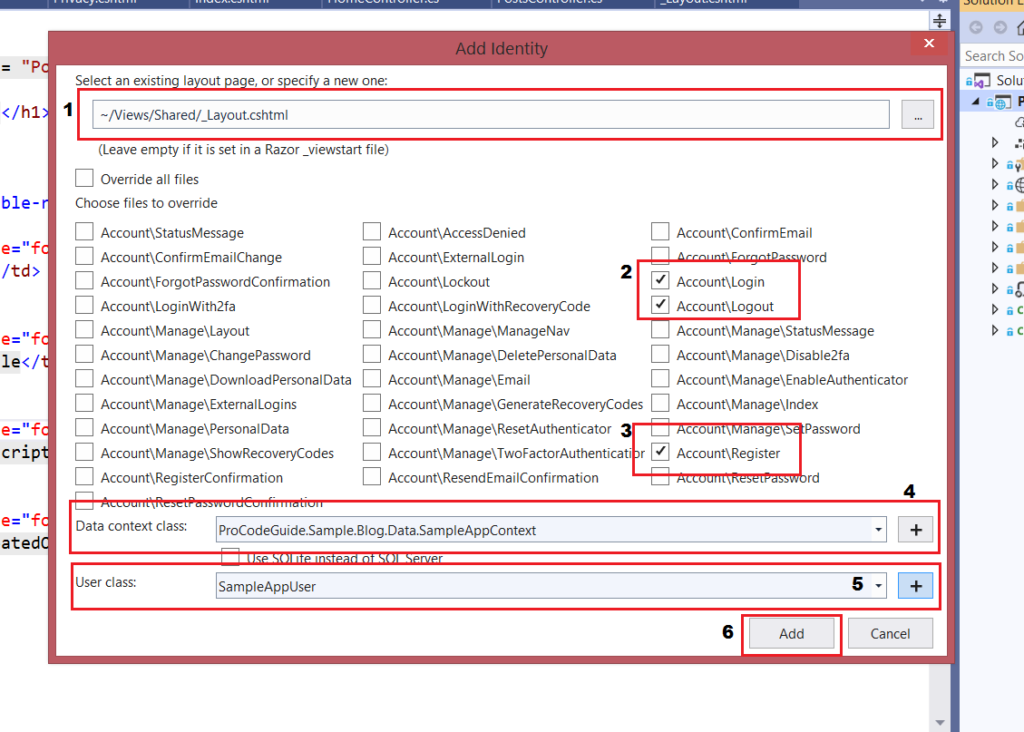
ASP.NET Core Identity has provided with the ready library but you can override the standard implementation by scaffolding the items which you need to override.
Also above actions installs following NuGet packages implicitly.
Microsoft.VisualStudio.Web.CodeGeneration.Design
Microsoft.EntityFrameworkCore.Sqlsever
Microsoft.EntityFrameworkCore.Tools
Microsoft.AspNetCore.Identity.UI
Microsoft.AspNetCore.Identity.EntityFrameworkCore
ASP.NET Core Identity makes use of Entity Framework to manage user profiles. If you need further details on how an entity framework works then check my other article on Entity Framework Core in ASP.NET Core 3.1
Generated Code Explained
Areas/Identity/IdentityHostingStartup.cs file this works like a starting class for the project and is called each time the project starts. This class holds the configuration of identity-related services & Entity framework configuration for identity.
public class IdentityHostingStartup : IHostingStartup
{
    public void Configure(IWebHostBuilder builder)
    {
        builder.ConfigureServices((context, services) => {
            services.AddDbContext<SampleAppContext>(options =>
                options.UseSqlServer(
                    context.Configuration.GetConnectionString("SampleAppContextConnection")));

            services.AddDefaultIdentity<SampleAppUser>(options => options.SignIn.RequireConfirmedAccount = true)
                .AddEntityFrameworkStores<SampleAppContext>();
        });
    }
}
Areas/Identity/SampleAppUser.cs file which derives from Identity User. This class allows you to add your own fields for user profiles. Identity framework comes with default properties for user profile you can add your application-specific properties here. After adding properties you will have to modify Register Screen to capture new properties for the user.
public class SampleAppUser : IdentityUser
{
    public string FullName { get; set; }
}
Area/Identity/SampleAppContext.cs file which is the entity framework context class used by Identity.
public class SampleAppContext : IdentityDbContext<SampleAppUser>
{
    public SampleAppContext(DbContextOptions<SampleAppContext> options)
        : base(options)
    {
    }

    protected override void OnModelCreating(ModelBuilder builder)
    {
        base.OnModelCreating(builder);
        // Customize the ASP.NET Identity model and override the defaults if needed.
        // For example, you can rename the ASP.NET Identity table names and more.
        // Add your customizations after calling base.OnModelCreating(builder);
    }
}
Also SQL Server connection is added to Appsettings.json file.
  "ConnectionStrings": {
    "SampleAppContextConnection": "Server=(localdb)\\mssqllocaldb;Database=ProCodeGuide.Sample.Blog;Trusted_Connection=True;MultipleActiveResultSets=true"
  }
Add Migrations
To automate the migrations & create a database for Identity we need to run the following commands in the package manager console.
add-migration InitialMigration
update-database
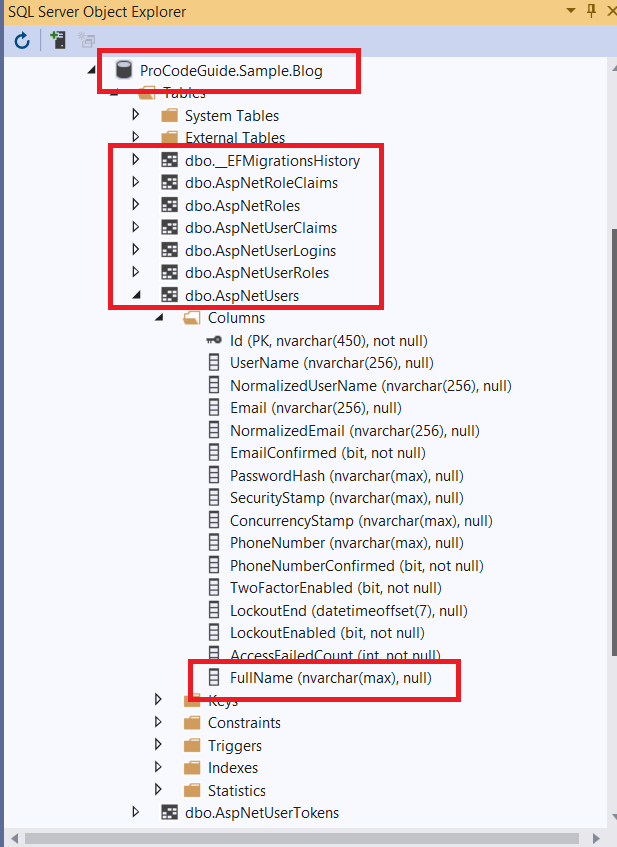
You can see that Application specific property ‘FullName’ for user which we configured is also part of AspNetUsers table.
You can also explore the cshtml files for Login, Logout & Register which are available in folder Areas/Identity/Pages/Account
Execute Application
After building and running application still you don’t see any changes no login screen & no security added to action view all post & post details. Still you need to do following changes for identity related links to appear and to secure your actions.
For Identity-related links Login, Logout (after login) & Register to appear to add following code to application layout file i.e Views/Shared/_Layout.cshtml. Add it in the header tag.
<div class="col-md-2">
    <partial name="_LoginPartial.cshtml" />
</div>
To secure your actions add Authorize attribute (part of Microsoft.AspNetCore.Authorization namespace) either at a controller level for all actions or at Action level for specific actions.
[Authorize]
public class PostsController : Controller
{
    //Remaining code has been removed
}
Make changes to Startup class to add Authentication, Razor Pages & Endpoints for Razor Pages
public class Startup
{
    public Startup(IConfiguration configuration)
    {
        Configuration = configuration;
    }

    public IConfiguration Configuration { get; }

    // This method gets called by the runtime. Use this method to add services to the container.
    public void ConfigureServices(IServiceCollection services)
    {
        services.AddControllersWithViews();
        services.AddRazorPages();
    }

    // This method gets called by the runtime. Use this method to configure the HTTP request pipeline.
    public void Configure(IApplicationBuilder app, IWebHostEnvironment env)
    {
        if (env.IsDevelopment())
        {
            app.UseDeveloperExceptionPage();
        }
        else
        {
            app.UseExceptionHandler("/Home/Error");
        }
        app.UseStaticFiles();

        app.UseRouting();

        app.UseAuthentication();

        app.UseAuthorization();

        app.UseEndpoints(endpoints =>
        {
            endpoints.MapControllerRoute(
                name: "default",
                pattern: "{controller=Home}/{action=Index}/{id?}");
            endpoints.MapRazorPages();
        });
    }
}
Now when you run application and try to navigate to post pages it will redirect you to login page if you are not logged in already. Register link is also available to create new users.
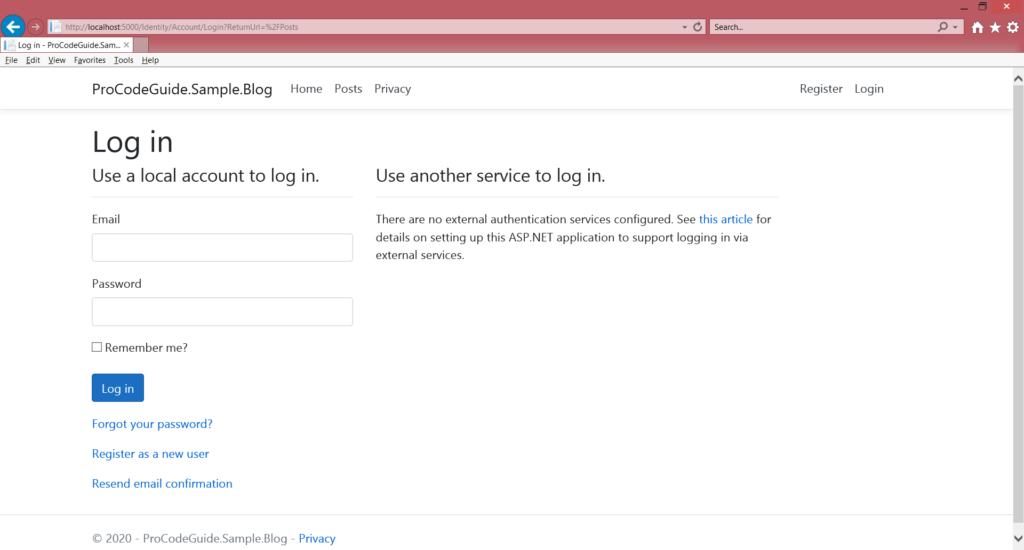
Also, note that only users with confirmed email are allowed to log in so after registering a user link to confirm the email is available which should be clicked to confirm email. Ideally, a mail should be sent out to the user to confirm email but by default, email support is not enabled so the link has been provided directly for an email confirmation.
Save custom user properties to database
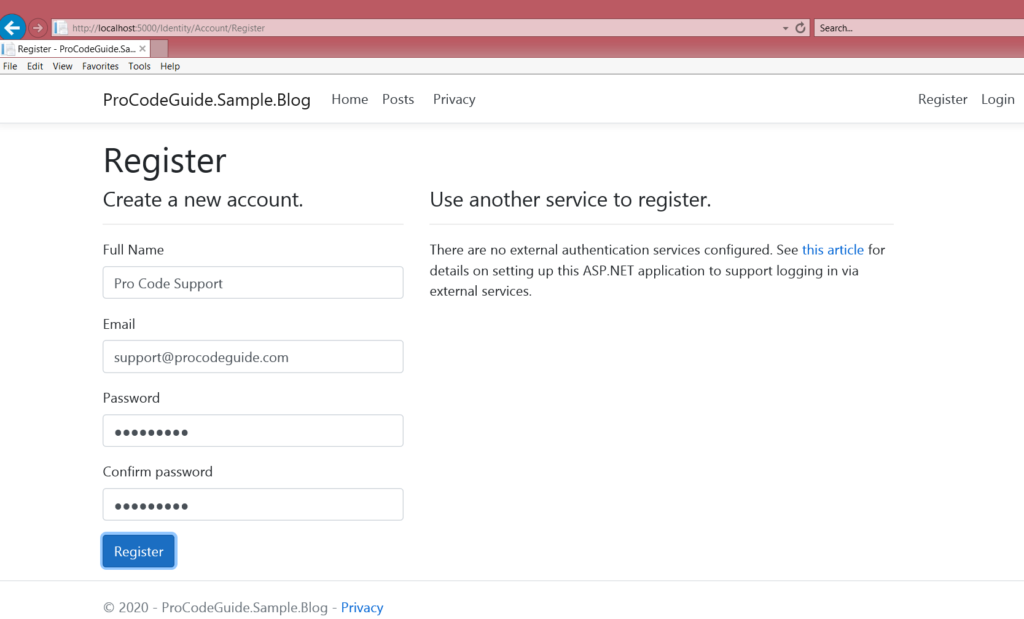
ASP.NET Core Identity allows us to add custom fields to the user profile. Previously we added new user profile property Full Name but we did not add any code to save it to the database. Here we will make changes to save the same to the database as part of registering a new user.
First, we will have to make changes in Areas/Identity/Pages/Account/Register.cshtml to add an input box for user to enter it as part of the registration process. We will below HTML in Register.cshtml before Email Input
<div class="form-group">
    <label asp-for="Input.FullName"></label>
    <input asp-for="Input.FullName" class="form-control" />
    <span asp-validation-for="Input.FullName" class="text-danger"></span>
</div>
Then we need to add FullName property in InputModel class in Register.cshtml.cs
public class InputModel
{
    [Required]
    [StringLength(25, ErrorMessage = "The {0} must be at least {2} and at max {1} characters long.", MinimumLength = 10)]
    [Display(Name = "Full Name")]
    public string FullName { get; set; }

    //Remaining Code has been removed
}
Finally we need set the value for FullName property in OnPostAsync method in Register.cshtml.cs file. Modify code as show below to set FullName from InputModel.
var user = new SampleAppUser { UserName = Input.Email, Email = Input.Email, FullName = Input.FullName };
After running code you should be able to see Full Name text box in Register form & on Register click the value entered in text box is saved to database in AspNetUsers table in column FullName.
Summary
In this first article for security series, we saw how to add Identity to additional ASP.NET Core application. We added Identity to add functionalities like Login, Logout & Register. We also saw how to secure our resources so that unauthorized access to the application is blocked.
Download Source Code
https://github.com/procodeguide/Sample.Identity.GettingStarted
References – https://docs.microsoft.com/en-us/aspnet/core/security/authentication/identity?view=aspnetcore-3.1&tabs=visual-studio
Hope you found this article useful. Please support the Author


I am happy to find your article, this finally clarified Identity for me.
Thanks a lot!
i created project a user mentioned and even download the source code link you provided, when u i do login it says
Wrong login attempt
If you are able to create a user and confirm it then you should be able to use the same credentials for login.