This article will get you started with what are ASP.NET Core Identity roles and the need for roles, how to enable ASP.NET Core Identity roles in MVC Application, and how to implement role-based authorization.
Role-based authorization is for basic authorization where roles & their permissions can be decided at the start and there are no requirements for dynamic changing user permissions at runtime.
This is the third post in the series – ASP.NET Core Security. In my previous posts, I covered how to get started with ASP.NET Core Identity, understanding claims & implementing claims-based authorization. In this article, we will learn about roles and how to implement ASP.NET Core Identity roles-based authorization.
Before you start reading this I would suggest that first, you read my previous article about ASP.NET Core Identity – Getting Started
- ASP.NET Core Identity – Getting Started
- ASP.NET Core Identity Claims-based Authorization
- ASP.NET Core Identity Identity Roles based Authorization
- Implement Cookie Authentication in ASP.NET Core
- Secure Applications with OAuth2 and OpenID Connect in ASP.NET Core 5 – Complete Guide
- Custom Identity User Management in ASP.NET Core – Detailed Guide
Table of Contents
Introduction to ASP.NET Core Identity roles
Roles are a standard & common approach for implementing authorization in Applications. Identity can contain roles & roles, in turn, contain permissions for performing actions in the application. You can assign multiple roles to a user. When a user is created it can be linked to one or more roles.
E.g. in our Sample Blog App which we created as part of Identity Getting Started user support@procodeguide.com can be administrator & procoder@procodeguide.com can be assigned the role of a normal user. Based on permissions set for administrator & normal user both users will be allowed to perform different actions in the application.
Need for roles
Now if the user accesses any web application with only user-id & password (i.e. without role) then all users will have access to all features in the application. Also, it will be difficult to restrict access to users based on user id as new users will be added and each time it will require a change in access specific logic.
Instead, we can create roles like admin, normal user, power user, etc. and we can assign required access to these roles. Now when we create users we can add users to specific role groups based on the type of access required for that user.
So by doing this application access will be role-based and users can be assigned these roles based on the access required.
Implement Roles using ASP.NET Core Identity Roles in Web Application
We will learn how to implement roles using ASP.NET Core Identity roles in Web application with Identity. For this, we will build upon the existing source code of the Sample Blog App in which we have so far added identity & implemented claim based authorization. Here is the link for the source code which will be used for demonstration of roles implementation & authorization.
https://github.com/procodeguide/Samples.Identity.Claims
After downloading the above project you will have to perform Add Migrations & update the database to the project, in Visual Studio, by running the below commands in the package manager console.
add-migration FirstMigration
update-database
After running the above commands run the project and you should see the below screen.
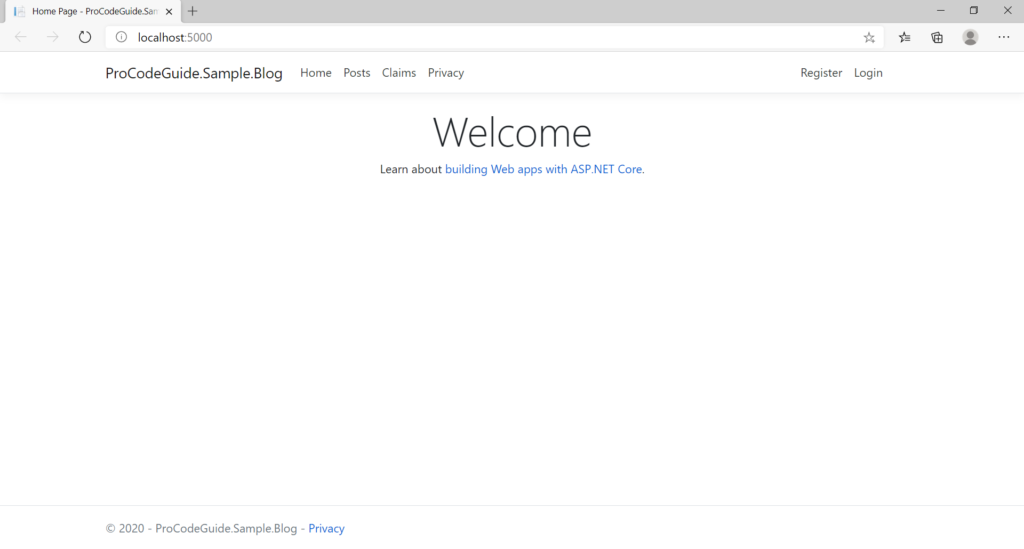
Let’s enable roles in our ASP.NET Core application i.e. in our sample blog app & then we will add UI to create new roles and enable role assigning during user creation i.e. during register user.
Enabling ASP.NET Core Identity Roles in MVC Application
To enable roles in the ASP.NET Core Application we need to modify Configure method in the Areas/Identity/IdentityHostingStartup.cs file as shown below
public void Configure(IWebHostBuilder builder)
{
    builder.ConfigureServices((context, services) => {
        services.AddDbContext<SampleAppContext>(options =>
            options.UseSqlServer(
                context.Configuration.GetConnectionString("SampleAppContextConnection")));

        services.AddIdentity<SampleAppUser, IdentityRole>(options => options.SignIn.RequireConfirmedAccount = true)
            .AddDefaultUI()
            .AddEntityFrameworkStores<SampleAppContext>()
            .AddDefaultTokenProviders();

        services.AddScoped<IUserClaimsPrincipalFactory<SampleAppUser>,
            ApplicationUserClaimsPrincipalFactory
            >();
    });
}
Also, we need to modify Areas/Identity/Data/ApplicationUserClaimsPrincipalFactory.cs so that roles can be supported by this factory
public class ApplicationUserClaimsPrincipalFactory : UserClaimsPrincipalFactory<SampleAppUser, IdentityRole>
{
    public ApplicationUserClaimsPrincipalFactory(
        UserManager<SampleAppUser> userManager,
        RoleManager<IdentityRole> roleManager,
        IOptions<IdentityOptions> options
        ) : base(userManager, roleManager, options)
    {

    }

    protected override async Task<ClaimsIdentity> GenerateClaimsAsync(SampleAppUser user)
    {
        var identity = await base.GenerateClaimsAsync(user);

        identity.AddClaim(new Claim("FullName",
            user.FullName
            ));

        return identity;
    }
}
Let’s wire the UI to create new ASP.NET Core Identity Roles
Add role controller to view & create roles in our Sample Blog App i.e. Controllers/RoleController.cs
public class RoleController : Controller
{
    RoleManager<IdentityRole> roleManager;

    public RoleController(RoleManager<IdentityRole> roleManager)
    {
        this.roleManager = roleManager;
    }

    public IActionResult Index()
    {
        var roles = roleManager.Roles.ToList();
        return View(roles);
    }

    public IActionResult Create()
    {
        return View(new IdentityRole());
    }

    [HttpPost]
    public async Task<IActionResult> Create(IdentityRole role)
    {
        await roleManager.CreateAsync(role);
        return RedirectToAction("Index");
    }
}
Now let’s add views for the index & create actions i.e. Views/Role/Index.cshtml & Views/Role/Create.cshtml
@model IEnumerable<Microsoft.AspNetCore.Identity.IdentityRole>
@{
    ViewData["Title"] = "Index";
}

<h1>List of Roles</h1>
<a asp-action="Create">Create</a>
<table class="table table-striped table-bordered">
    <thead>
        <tr>
            <td>Id</td>
            <td>Name</td>
        </tr>
    </thead>
    <tbody>
        @foreach (var role in Model)
        {
            <tr>
                <td>@role.Id</td>
                <td>@role.Name</td>
            </tr>

        }
    </tbody>
</table>
@model Microsoft.AspNetCore.Identity.IdentityRole

@{
    ViewData["Title"] = "Create";
}
<h1>Create Role</h1>
<hr />
<div class="row">
    <div class="col-md-4">
        <form asp-action="Create">
            <div asp-validation-summary="ModelOnly" class="text-danger"></div>
            <div class="form-group">
                <label asp-for="Name" class="control-label"></label>
                <input asp-for="Name" class="form-control" />
                <span asp-validation-for="Name" class="text-danger"></span>
            </div>
            <div class="form-group">
                <input type="submit" value="Create" class="btn btn-primary" />
            </div>
        </form>
    </div>
</div>
<div>
    <a asp-action="Index">Back to List</a>
</div>
@section Scripts {
    @{await Html.RenderPartialAsync("_ValidationScriptsPartial");
    }
}
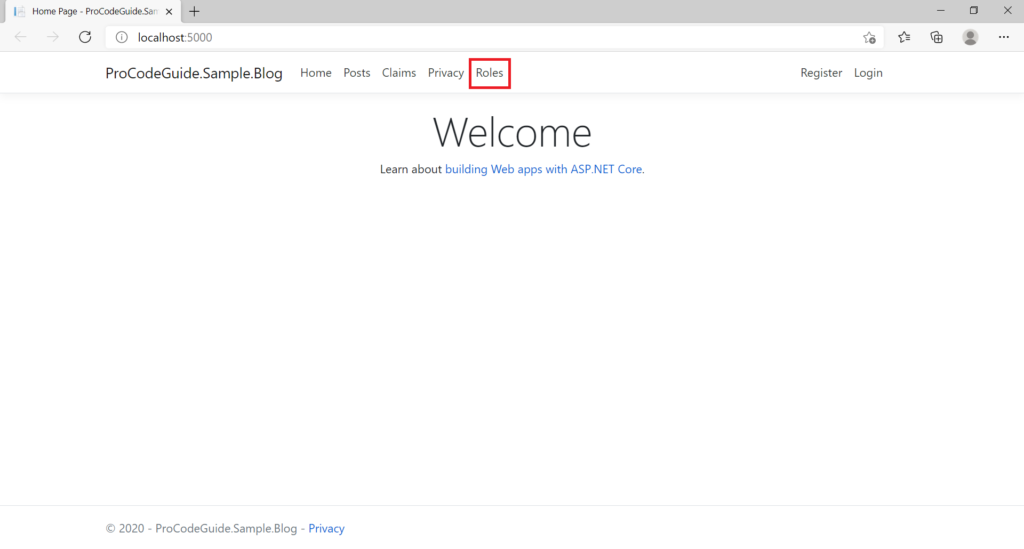
Now to display a link for Roles on the Main page add the following code to Views/Shared/_Layout.cshtml. Add following code under unordered HTML list for Links
<li class="nav-item">
    <a class="nav-link text-dark" asp-area="" asp-controller="Role" asp-action="Index">Roles</a>
</li>
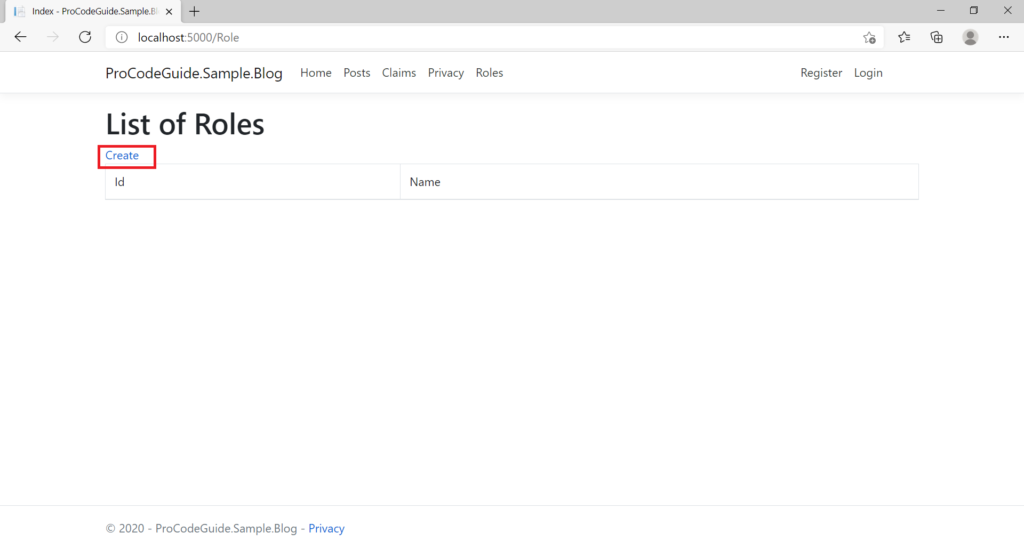
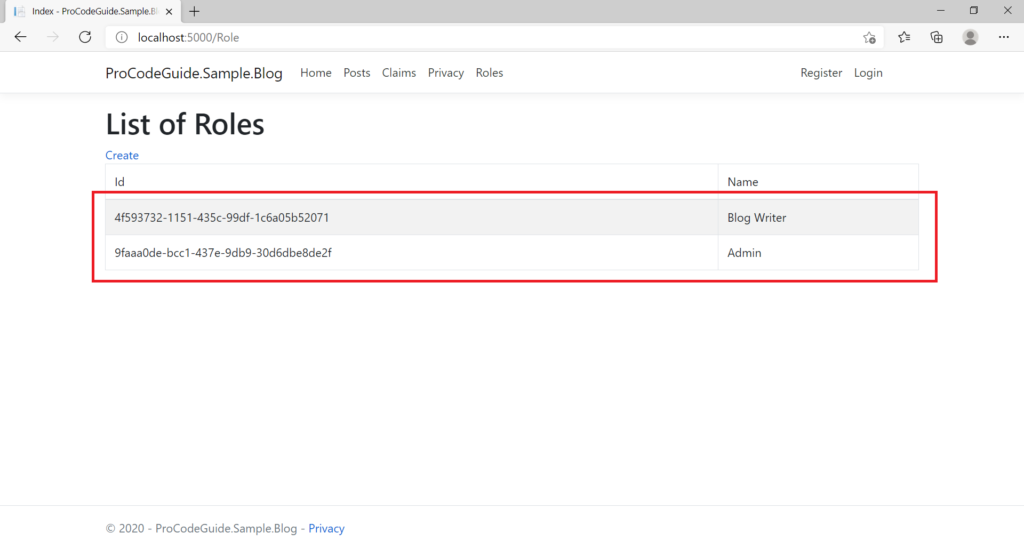
Let’s run the code & create a couple of roles by navigating to Roles links
Enable role assignment on user creation i.e. Register
Let’s add a role to the page where we create a new user so that we are able to specify a role for the user when the user is being created. For this, we will have to change the register view to capture the role & saving logic on the register button to save the role for the user along with user creation.
Make below changes in Areas/Identity/Pages/Account/Register.cshtml file
@page
@model RegisterModel
@{
    ViewData["Title"] = "Register";
    var roles = (List<IdentityRole>)ViewData["roles"];
}

<h1>@ViewData["Title"]</h1>

<div class="row">
    <div class="col-md-4">
        <form asp-route-returnUrl="@Model.ReturnUrl" method="post">
            <h4>Create a new account.</h4>
            <hr />
            <div asp-validation-summary="All" class="text-danger"></div>
            <div class="form-group">
                <label asp-for="Input.FullName"></label>
                <input asp-for="Input.FullName" class="form-control" />
                <span asp-validation-for="Input.FullName" class="text-danger"></span>
            </div>
            <div class="form-group">
                <label asp-for="Input.Email"></label>
                <input asp-for="Input.Email" class="form-control" />
                <span asp-validation-for="Input.Email" class="text-danger"></span>
            </div>
            <div class="form-group">
                <label asp-for="Input.Password"></label>
                <input asp-for="Input.Password" class="form-control" />
                <span asp-validation-for="Input.Password" class="text-danger"></span>
            </div>
            <div class="form-group">
                <label asp-for="Input.ConfirmPassword"></label>
                <input asp-for="Input.ConfirmPassword" class="form-control" />
                <span asp-validation-for="Input.ConfirmPassword" class="text-danger"></span>
            </div>
            <div class="form-group">
                <label asp-for="Input.UserRole"></label>
                <select asp-for="Input.UserRole" class="form-control" asp-items='new SelectList(roles,"Id","Name")'>
                </select>
                <span asp-validation-for="Input.UserRole" class="text-danger"></span>
            </div>
            <button type="submit" class="btn btn-primary">Register</button>
        </form>
    </div>
    <div class="col-md-6 col-md-offset-2">
        <section>
            <h4>Use another service to register.</h4>
            <hr />
            @{
                if ((Model.ExternalLogins?.Count ?? 0) == 0)
                {
                    <div>
                        <p>
                            There are no external authentication services configured. See <a href="https://go.microsoft.com/fwlink/?LinkID=532715">this article</a>
                            for details on setting up this ASP.NET application to support logging in via external services.
                        </p>
                    </div>
                }
                else
                {
                    <form id="external-account" asp-page="./ExternalLogin" asp-route-returnUrl="@Model.ReturnUrl" method="post" class="form-horizontal">
                        <div>
                            <p>
                                @foreach (var provider in Model.ExternalLogins)
                                {
                                    <button type="submit" class="btn btn-primary" name="provider" value="@provider.Name" title="Log in using your @provider.DisplayName account">@provider.DisplayName</button>
                                }
                            </p>
                        </div>
                    </form>
                }
            }
        </section>
    </div>
</div>
@section Scripts {
    <partial name="_ValidationScriptsPartial" />
}
Make below changes in Areas/Identity/Pages/Account/Register.cshtml.cs file
[AllowAnonymous]
public class RegisterModel : PageModel
{
    private readonly SignInManager<SampleAppUser> _signInManager;
    private readonly UserManager<SampleAppUser> _userManager;
    private readonly ILogger<RegisterModel> _logger;
    private readonly IEmailSender _emailSender;
    private readonly RoleManager<IdentityRole> _roleManager;

    public RegisterModel(
        UserManager<SampleAppUser> userManager,
        SignInManager<SampleAppUser> signInManager,
        ILogger<RegisterModel> logger,
        IEmailSender emailSender,
        RoleManager<IdentityRole> roleManager)
    {
        _userManager = userManager;
        _signInManager = signInManager;
        _logger = logger;
        _emailSender = emailSender;
        _roleManager = roleManager;
    }

    [BindProperty]
    public InputModel Input { get; set; }

    public string ReturnUrl { get; set; }

    public IList<AuthenticationScheme> ExternalLogins { get; set; }

    public class InputModel
    {
        [Required]
        [StringLength(25, ErrorMessage = "The {0} must be at least {2} and at max {1} characters long.", MinimumLength = 10)]
        [Display(Name = "Full Name")]
        public string FullName { get; set; }

        [Required]
        [EmailAddress]
        [Display(Name = "Email")]
        public string Email { get; set; }

        [Required]
        [StringLength(100, ErrorMessage = "The {0} must be at least {2} and at max {1} characters long.", MinimumLength = 6)]
        [DataType(DataType.Password)]
        [Display(Name = "Password")]
        public string Password { get; set; }

        [DataType(DataType.Password)]
        [Display(Name = "Confirm password")]
        [Compare("Password", ErrorMessage = "The password and confirmation password do not match.")]
        public string ConfirmPassword { get; set; }

        [Required]
        [Display(Name = "User Role")]
        public string UserRole { get; set; }
    }

    public async Task OnGetAsync(string returnUrl = null)
    {
        ViewData["roles"] = _roleManager.Roles.ToList();
        ReturnUrl = returnUrl;
        ExternalLogins = (await _signInManager.GetExternalAuthenticationSchemesAsync()).ToList();
    }

    public async Task<IActionResult> OnPostAsync(string returnUrl = null)
    {
        returnUrl = returnUrl ?? Url.Content("~/");
        var role = _roleManager.FindByIdAsync(Input.UserRole).Result;
        ExternalLogins = (await _signInManager.GetExternalAuthenticationSchemesAsync()).ToList();
        if (ModelState.IsValid)
        {
            var user = new SampleAppUser { UserName = Input.Email, Email = Input.Email, FullName = Input.FullName };
            var result = await _userManager.CreateAsync(user, Input.Password);
            if (result.Succeeded)
            {
                _logger.LogInformation("User created a new account with password.");

                await _userManager.AddToRoleAsync(user, role.Name);

                var code = await _userManager.GenerateEmailConfirmationTokenAsync(user);
                code = WebEncoders.Base64UrlEncode(Encoding.UTF8.GetBytes(code));
                var callbackUrl = Url.Page(
                    "/Account/ConfirmEmail",
                    pageHandler: null,
                    values: new { area = "Identity", userId = user.Id, code = code, returnUrl = returnUrl },
                    protocol: Request.Scheme);

                await _emailSender.SendEmailAsync(Input.Email, "Confirm your email",
                    $"Please confirm your account by <a href='{HtmlEncoder.Default.Encode(callbackUrl)}'>clicking here</a>.");

                if (_userManager.Options.SignIn.RequireConfirmedAccount)
                {
                    return RedirectToPage("RegisterConfirmation", new { email = Input.Email, returnUrl = returnUrl });
                }
                else
                {
                    await _signInManager.SignInAsync(user, isPersistent: false);
                    return LocalRedirect(returnUrl);
                }
            }
            foreach (var error in result.Errors)
            {
                ModelState.AddModelError(string.Empty, error.Description);
            }
        }

        ViewData["roles"] = _roleManager.Roles.ToList();
        // If we got this far, something failed, redisplay form
        return Page();
    }
}
Let’s run the code to register a new user with an admin role.
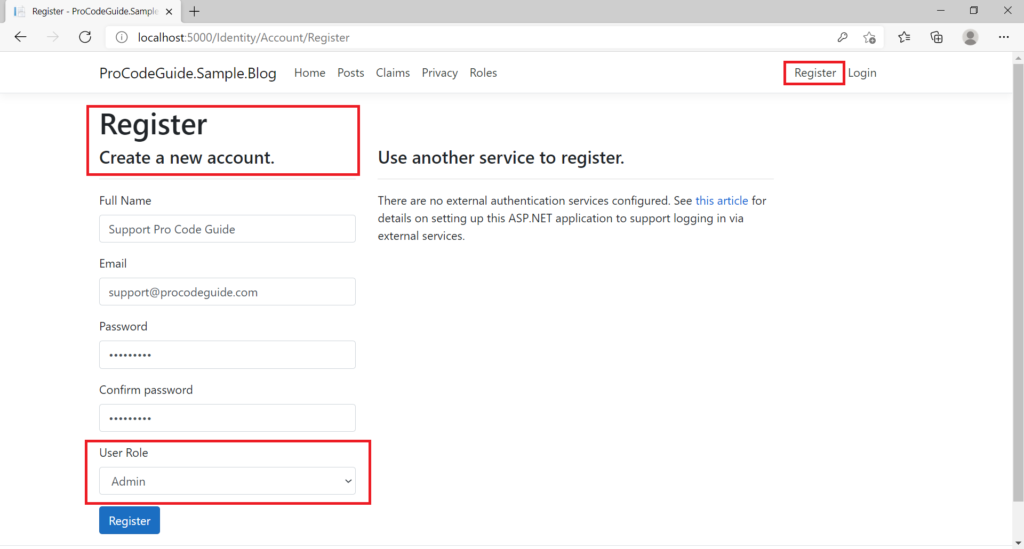
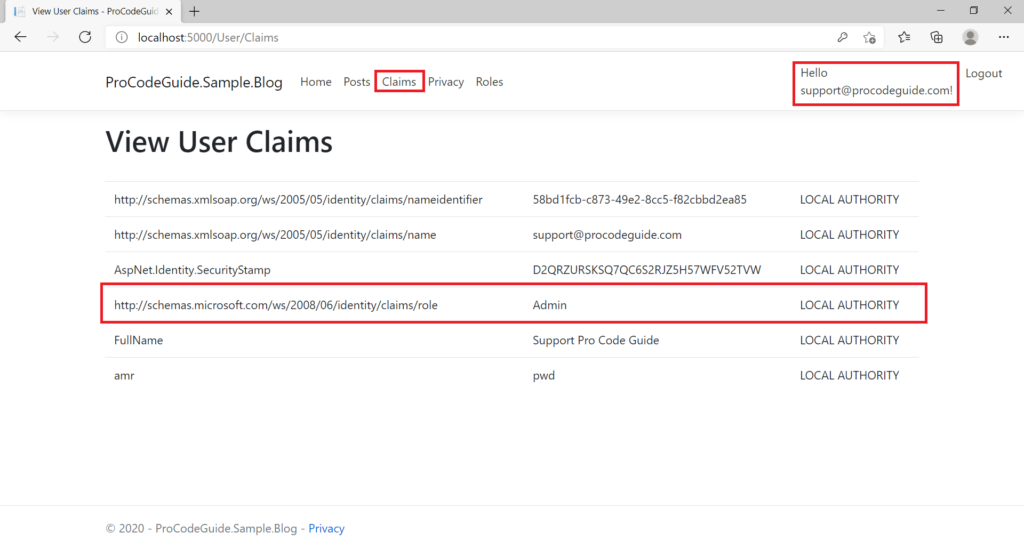
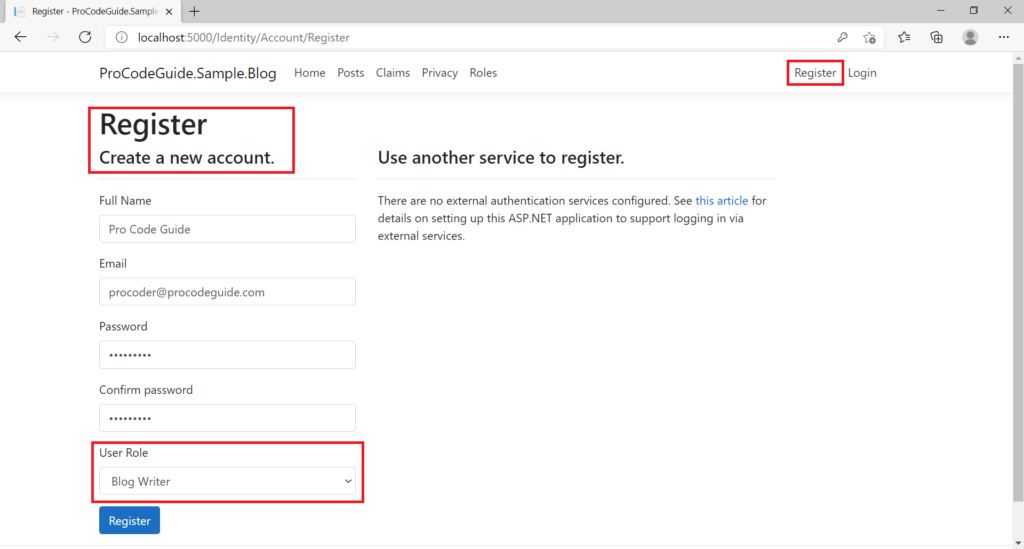
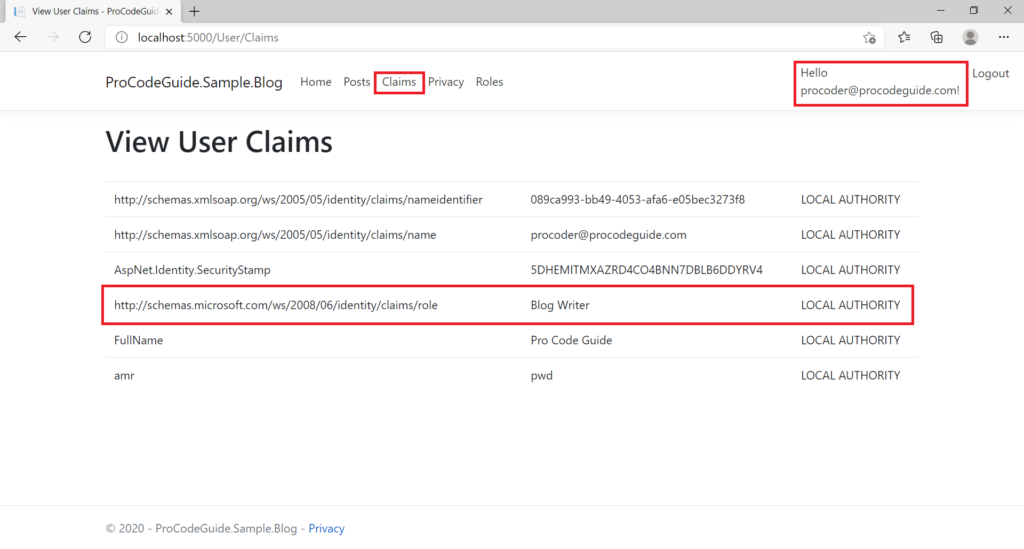
So far what we have done is enabled roles in the ASP.NET Core MVC application & then added code to be able to create new roles so that we are able to change register view & code to capture a role for the user during user creation on the register.
Now let’s use this role to implement authorization for the users based on this role which is assigned to the user during user creation.
Implement ASP.NET Core Identity Roles based authorization
Now let’s implement some access restrictions based on the role admin that we have assigned to the new user support@procodeguide.com while creating that user. What we saw was we were able to create new roles without login i.e. anyone can browse to application link and create roles.
We will add restrictions on role creation that users with an admin role will be able to create roles and all other users will be able to view roles.
As shown in the code below we will register a policy ‘rolecreation’ for role creation for an admin role in method ConfigureServices Method in a startup.cs file
public void ConfigureServices(IServiceCollection services)
{
    services.AddControllersWithViews();
    services.AddRazorPages();

    services.AddAuthorization(options =>
    {
        options.AddPolicy("EmailID", policy =>
        policy.RequireClaim("http://schemas.xmlsoap.org/ws/2005/05/identity/claims/name", "support@procodeguide.com"
        ));

        options.AddPolicy("rolecreation", policy =>
        policy.RequireRole("Admin")
        );
    });
}
Now we will apply this policy ‘rolecreation’ in role controller to actions for role creation to restrict role creation to admin roles only. Make below changes to Controllers/RoleController.cs
public class RoleController : Controller
{
    RoleManager<IdentityRole> roleManager;

    public RoleController(RoleManager<IdentityRole> roleManager)
    {
        this.roleManager = roleManager;
    }

    public IActionResult Index()
    {
        var roles = roleManager.Roles.ToList();
        return View(roles);
    }

    [Authorize(Policy = "rolecreation")]
    public IActionResult Create()
    {
        return View(new IdentityRole());
    }

    [HttpPost]
    [Authorize(Policy = "rolecreation")]
    public async Task<IActionResult> Create(IdentityRole role)
    {
        await roleManager.CreateAsync(role);
        return RedirectToAction("Index");
    }
}
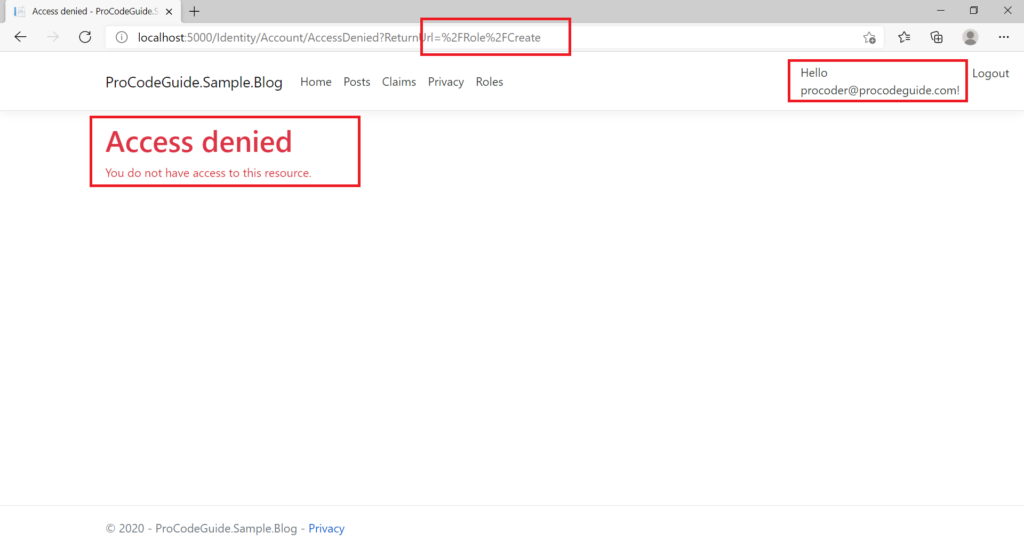
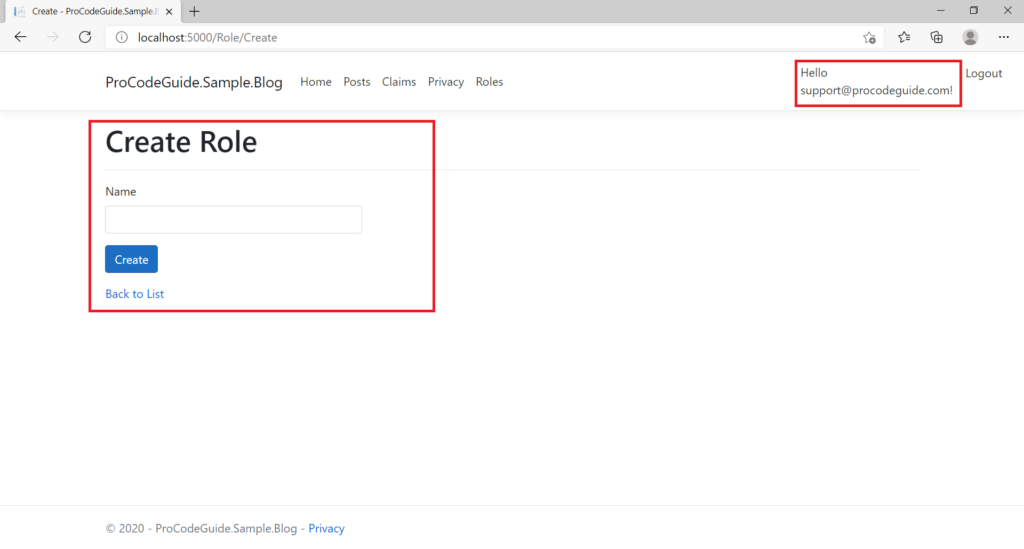
After making the above changes let’s run the code to check ASP.NET Core Identity Roles based authorization. Now it will not be possible to create roles without login & also after login only users with an admin role will be able to create roles.
Summary
In this article, we learned how to create ASP.NET Core Identity roles, assign roles to users & use these identity roles to implement authorization for users based on roles assigned to them. Role-based authorization is a very commonly used implementation for restricting access to users. Users can be created and assigned roles based on access requirements for the user.
We made use of one of the important features of ASP.NET core that is to define authorization policies based on roles & we made use of this policy to control access to controller actions.
References: ASP.NET Core Identity Roles based Authorization
Download Source Code
https://github.com/procodeguide/Sample.Identity.Roles
Hope you found this article useful. Please support the Author


