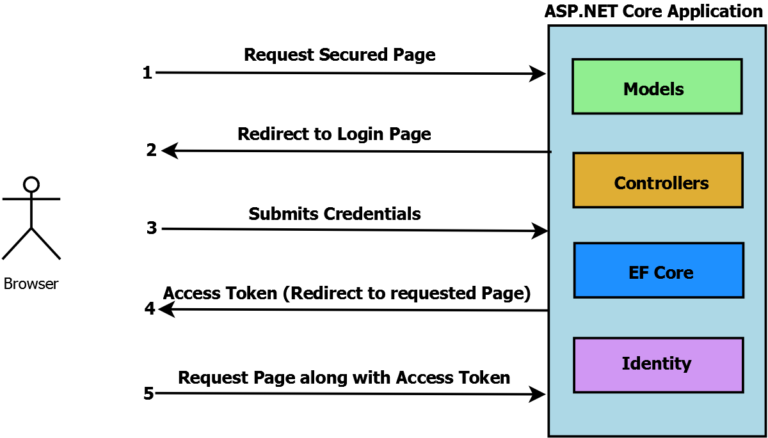
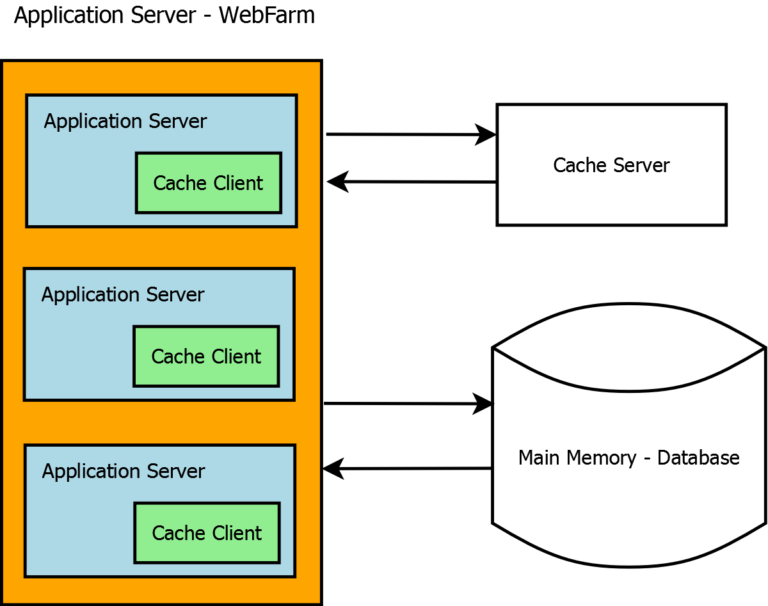
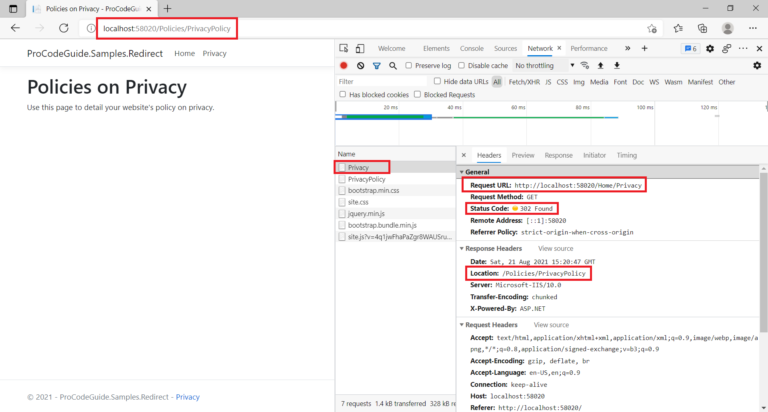
This article will get you started with implementing cookie authentication in ASP.NET Core applications. Cookie authentication allows you to have your own login/register screens & custom logic for user-id/password validation without the need to use ASP.NET Core Identity.
This is the fourth post in the Series – ASP.NET Core Security. In my previous posts, I covered how to get started with ASP.NET Core Identity, understanding claims/roles & implementing claims/roles-based authorization.
- ASP.NET Core Identity – Getting Started
- ASP.NET Core Identity Claims-based Authorization
- ASP.NET Core Identity Identity Roles based Authorization
- Implement Cookie Authentication in ASP.NET Core
- Secure Applications with OAuth2 and OpenID Connect in ASP.NET Core 5 – Complete Guide
- Custom Identity User Management in ASP.NET Core – Detailed Guide
Table of Contents
Introduction to cookie authentication
Cookie authentication in ASP.NET Core web application is the popular choice for developers to implement authentication in most customer-facing web applications and is also easy to implement in ASP.NET Core as it is provided out of the box without the need to reference any additional NuGet packages.
ASP.NET Core provides a cookie authentication mechanism which on login serializes the user details in form of claims into an encrypted cookie and then sends this cookie back to the server on subsequent requests which gets validated to recreate the user object from claims and sets this user object in the HttpContext so that it is available & is valid only for that request.
How does cookie authentication in ASP.NET Core work?
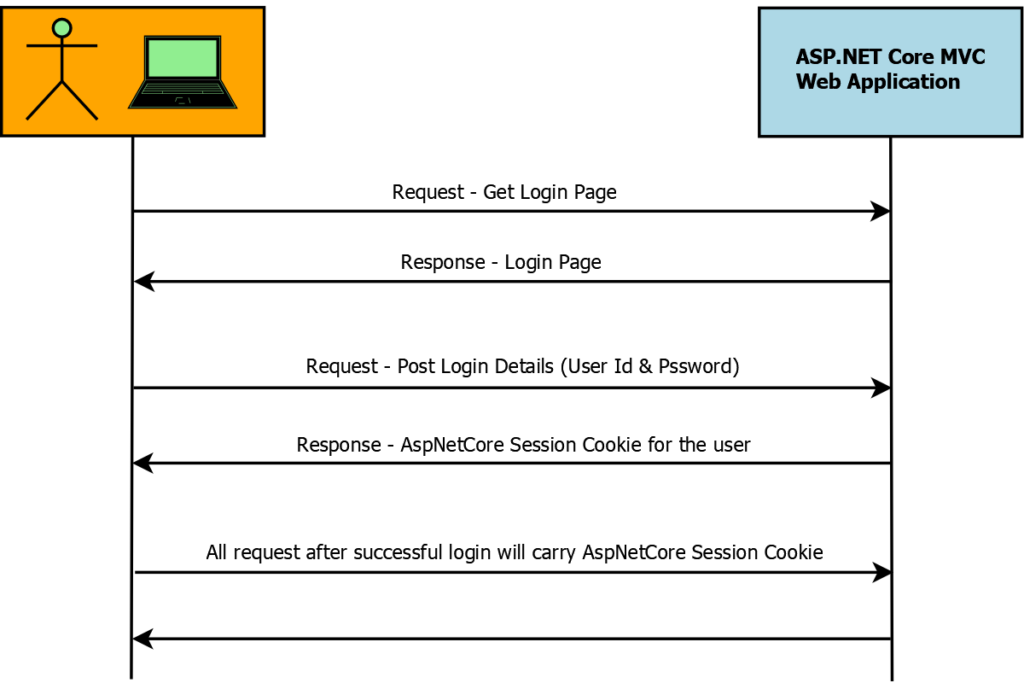
- User requests URL from the server
- Based on the access set server will either return the page if it’s a public page or will return the login page if its a secured page i.e. asking the user to login to access the secured page
- User will perform login action & credentials will be sent to the server for validation
- If provided credentials are valid then the server will set an authentication cookie in response.
- Now all further requests from the user will carry this cookie in the header so that on each request server knows that the user is already authenticated & also user details can be read from cookie to identity request if from which user.
Implement Cookie Authentication in ASP.NET Core Web Application
For a demonstration of cookie authentication in ASP.NET Core, we will be creating an ASP.NET Core MVC application so let’s get started by creating the project as shown below.
Create a new ASP.NET Core MVC Web Application
Select ASP.NET Core Web APP (Model-View-Controller) and click on create button

Let’s wire the UI for Login Page
Add login controller & login view so that users are able to request login page, enter valid credentials, and submit the same to successfully authenticate their identity.
Add model for the user in Model/User.cs
public class User
{
    [Required]
    public string UserId { get; set; }

    [Required]
    [DataType(DataType.Password)]
    public string Password { get; set; }
}
Login view will have inputs for User-Id\Password and Log-in button to perform the login process. Add View in Views/Login/Index.cshtml
@model User

@{
    ViewData["Title"] = "Log in";
}

<h1>@ViewData["Title"]</h1>
<div class="row">
    <div class="col-md-4">
        <form asp-action="PerformLogin" method="post">
            <h4>Use a local account to log in.</h4>
            <hr />
            <div asp-validation-summary="ModelOnly" class="text-danger"></div>
            <div class="form-group">
                <label asp-for="UserId"></label>
                <input asp-for="UserId" class="form-control" />
                <span asp-validation-for="UserId" class="text-danger"></span>
            </div>
            <div class="form-group">
                <label asp-for="Password"></label>
                <input asp-for="Password" class="form-control" />
                <span asp-validation-for="Password" class="text-danger"></span>
            </div>
            <div class="form-group">
                <button type="submit" class="btn btn-primary">Log in</button>
            </div>
        </form>
    </div>
</div>
Finally, add controller for Login in Controllers/LoginController.cs.
public class LoginController : Controller
{
    [HttpGet]
    public IActionResult Index()
    {
        return View();
    }

    [HttpPost]
    public IActionResult PerformLogin([Bind] User userdetails)
    {
        if ((!string.IsNullOrEmpty(userdetails.UserId)) && (!string.IsNullOrEmpty(userdetails.Password)))
        {
            if ((userdetails.UserId.Equals("admin") && userdetails.Password.Equals("admin")))
            {
                return RedirectToAction("Index", "Home");
            }
        }
        return View("Index");
    }
}
Login Controller has two methods Index get method to get Login page & PeformLogin post method to handle submit action from the login page. In the method, performlogin have hardcoded the logic that if user-id & password are both same as admin i.e. login successful then redirect to Index/Home else remain on the same login page.
Also, change the default page from Home/Index to Login/Index in Configure method in Startup.cs file as shown below.
public void Configure(IApplicationBuilder app, IWebHostEnvironment env)
{
    //Other code has been remove for better readability

    app.UseEndpoints(endpoints =>
    {
        endpoints.MapControllerRoute(
            name: "default",
            pattern: "{controller=Login}/{action=Index}/{id?}");
    });
}
Before configuring cookie authentication in ASP.NET Core let’s secure the access to Home/Index so that only authorized users are able to access it. i.e. add authorize attribute to Home/Index in Controllers/HomeController.cs as shown below
public class HomeController : Controller
{
    private readonly ILogger<HomeController> _logger;

    public HomeController(ILogger<HomeController> logger)
    {
        _logger = logger;
    }

    [Authorize]
    public IActionResult Index()
    {
        return View();
    }

    public IActionResult Privacy()
    {
        return View();
    }

    [ResponseCache(Duration = 0, Location = ResponseCacheLocation.None, NoStore = true)]
    public IActionResult Error()
    {
        return View(new ErrorViewModel { RequestId = Activity.Current?.Id ?? HttpContext.TraceIdentifier });
    }
}
Now after the above change when you enter user-id/password as admin and click on the Log-in button then instead of navigating to Home/Index page it will throw an error as shown below
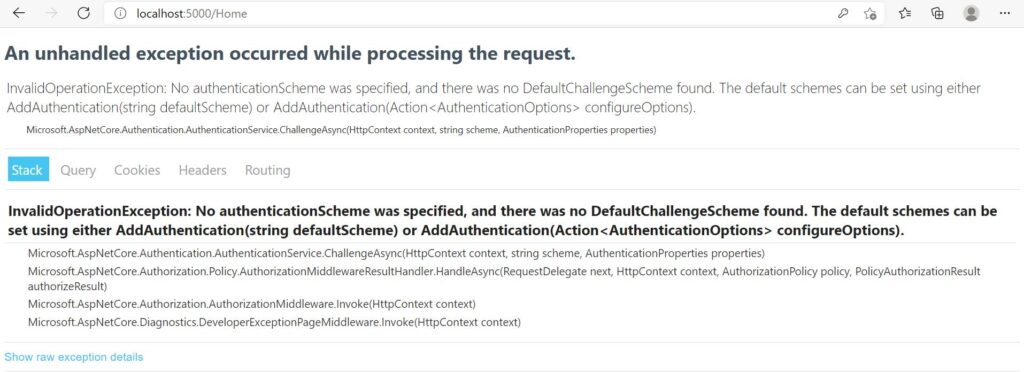
Now let’s work to resolve the above error by configuring cookie authentication in ASP.NET Core and setting the session for the user on successful login.
Configure Cookie Authentication in ASP.NET Core
Make changes in Startup.cs file to configure cookie authentication in ASP.NET Core application as shown below
public class Startup
{
    public Startup(IConfiguration configuration)
    {
        Configuration = configuration;
    }

    public IConfiguration Configuration { get; }

    // This method gets called by the runtime. Use this method to add services to the container.
    public void ConfigureServices(IServiceCollection services)
    {
        services.AddAuthentication(CookieAuthenticationDefaults.AuthenticationScheme)
                .AddCookie(options =>
                {
                    options.Cookie.Name = "MySessionCookie";
                    options.LoginPath = "/Login/Index";
                    options.SlidingExpiration = true;
                });

        services.AddControllersWithViews();
    }

    // This method gets called by the runtime. Use this method to configure the HTTP request pipeline.
    public void Configure(IApplicationBuilder app, IWebHostEnvironment env)
    {
        if (env.IsDevelopment())
        {
            app.UseDeveloperExceptionPage();
        }
        else
        {
            app.UseExceptionHandler("/Home/Error");
        }
        app.UseStaticFiles();

        app.UseRouting();

        var cookiePolicyOptions = new CookiePolicyOptions
        {
            MinimumSameSitePolicy = SameSiteMode.Strict,
            HttpOnly = Microsoft.AspNetCore.CookiePolicy.HttpOnlyPolicy.Always,
            Secure = CookieSecurePolicy.None,
        };

        app.UseCookiePolicy(cookiePolicyOptions);

        app.UseAuthentication();

        app.UseAuthorization();

        app.UseEndpoints(endpoints =>
        {
            endpoints.MapControllerRoute(
                name: "default",
                pattern: "{controller=Login}/{action=Index}/{id?}");
        });
    }
}
Make changes to PerformLogin method in Controllers/LoginController.cs file to set authentication cookie in response on successful login.
Please note that here I have hardcoded user-id/password validation as admin/admin for demonstration purpose only. In reality, you will be having some function to register a new user and that will store user-id/password in some datastore so you will be validating user-id/password against the data stored in that data store.
public class LoginController : Controller
{
    [HttpGet]
    public IActionResult Index()
    {
        return View();
    }

    [HttpPost]
    public async Task<IActionResult> PerformLogin([Bind] User userdetails)
    {
        if ((!string.IsNullOrEmpty(userdetails.UserId)) && (!string.IsNullOrEmpty(userdetails.Password)))
        {
            if ((userdetails.UserId.Equals("admin") && userdetails.Password.Equals("admin")))
            {
                var claims = new List<Claim>
                {
                    new Claim(ClaimTypes.Name, userdetails.UserId),
                    new Claim(ClaimTypes.Role, "User"),
                };

                var claimsIdentity = new ClaimsIdentity(
                    claims, CookieAuthenticationDefaults.AuthenticationScheme);

                var authProperties = new AuthenticationProperties
                {
                    ExpiresUtc = DateTime.Now.AddMinutes(10),
                };

                await HttpContext.SignInAsync(
                CookieAuthenticationDefaults.AuthenticationScheme,
                new ClaimsPrincipal(claimsIdentity),
                authProperties);

                return RedirectToAction("Index", "Home");
            }
        }
        return View("Index");
    }
}
The above code will set an authentication cookie in the response to performlogin after the user-id/password has been successfully validated as admin/admin. Once that cookie is set in response then all further requests from that browser will carry this cookie in the request header so that the ASP.NET MVC application knows that this user is already authenticated and can also identify that request is from which authenticated user.
Logout Session
you can log out of the session by using the below code on the logout link or any other place as per requirements
await context.HttpContext.SignOutAsync(
                CookieAuthenticationDefaults.AuthenticationScheme);
The above code will clear the authentication cookie. You will have to specify the authentication scheme for the cookie which you need to log out.
Authentication Cookie Options
Cookie Policy Options
Covering important properties for cookie policy options
- MinimumSameSitePolicy – Affects the cookie’s same site attribute
- HttpOnly – Affects whether cookies must be HttpOnly
- Secure – Affects whether cookies must be Secure
- CheckConsentNeeded – Checks if consent policies should be evaluated on this request. The default is false
Cookie Authentication Options
Covering important properties for cookie authentication options
- Cookie.Name – Name of the Cookie
- LoginPath – is used by the handler for the redirection target when handling ChallengeAsync
- SlidingExpiration – is set to true to instruct the handler to re-issue a new cookie with a new expiration time any time it processes a request
- AccessDeniedPath – is used by the handler for the redirection target when handling ForbidAsync
Authentication Properties Options
Covering important properties for authentication options
- IsPersistent – Gets or sets whether the authentication session is persisted across multiple requests
- ExpiresUtc – Gets or sets the time at which the authentication ticket expires
- AllowRefresh – Gets or sets if refreshing the authentication session should be allowed
- IssuedUtc – Gets or sets the time at which the authentication ticket was issued
React to user status changes in backend
Now when the session cookie is created and set then it is valid for that session and it becomes a single source of identity for authorizing actions in the MVC web application. Now cookie will be still valid if in the middle of the session user status is changed to inactive by either the admin user or the system user. End-user will not see any changes until they log out or the cookie becomes invalid.
To handle such cases cookie/user needs to be authenticated for the user changes during each request. For this, you will have to keep track of user changes i.e. if the user has not changed after the cookie issued DateTime then there is no need to re-validate the user.
In case there are changes in user details after cookie issued DateTime then you need to invalidate the cookie. To implement this scenario cookie authentication in ASP.NET Core provide an event that can be handled to implement user validations. The ValidatePrincipal() event can be overridden for validation of the cookie identity.
public class CustomCookieAuthenticationEvents : CookieAuthenticationEvents
{
    public override async Task ValidatePrincipal(CookieValidatePrincipalContext context)
    {
        //Check against the database if user object has changed since cookie issued DateTime,
        //if yes then SignOut (Invalidate) the cookie

        context.RejectPrincipal();

        await context.HttpContext.SignOutAsync(
            CookieAuthenticationDefaults.AuthenticationScheme);
    }
}
This ValidatePrincipal gets called on each request and validating cookie/identity on each request minimizes the risk of invalid users accessing the application.
Conclusion
Cookie authentication in ASP.NET Core is an easy & quick way to implement your application-specific login for user management & credentials validations. In this article, we saw how to add a user login form, validate user credentials, configure cookie authentication & set session cookies using cookie authentication.
Below is the complete source code from this article for a better understanding
References: Cookie authentication in ASP.NET Core
Download Source Code
https://github.com/procodeguide/Sample.CookieAuthentication
Hope you found this article useful. Please support the Author

