This article will get you started with the fundamentals of Machine Learning and how to get started with Machine Learning with .NET Core i.e. ML.NET. We will even learn different concepts of Machine learning with a brief overview.
Table of Contents
Introduction to Machine Learning
Today’s world is full of data and it is increasing day by day. There is a never-ending list of videos to watch, images to view, music to listen to, restaurants to visit, articles to read, stock market data, and we as humans are generating lots of data by the choices we make i.e. videos we watch, the music we listen to, restaurants we visit, etc.
Machine learning is all about computer algorithms that can make some sense out of the data available in the world today. Machine Learning algorithms improve through the experience without any code changes. For computers, this experience is in the form of data. Experience is built by feeding all this data to the algorithm and this data allows the algorithm to learn and build a model. This data which is fed to algorithms for learning is also known as Traning Data. Based on Training data the Machine Learning algorithm builds a model that allows it to make predictions or decisions without being explicitly programmed to do so.
Machine learning algorithm tries to identify the patterns in the data provided and based on this pattern tries to build a model. Once the model is built then additional data, which was not part of training data, is fed to the model to understand the efficiency and correctness of the model built.
Machine Learning is used widely in a variety of application such as
- Email Filtering
- Fraud Detection
- Self Driving Cars
- Image & Voice Recognition (Siri, Alexa, etc)
- Stock Market Predictions
- Recommendations from youtube, Netflix, etc
All entities have been collecting data about you and have been using Machine Learning algorithms to understand your choices so that they can make future suggestions to you based on your choices.
Types of Machine Learning
There are many types of Machine Learning algorithms that you can come across as a practitioner. What will be covering here is traditionally recognized 3 major categories i.e. Supervised, Unsupervised & Reinforcement.
Supervised Learning
As the name suggests it means that the activity will be monitored i.e. observe progress and direct the execution based on the observations. So how do we supervise a Machine Learning model we do so by providing the data to the algorithm which is labeled. For e.g., we provide pictures of cats & dogs to an algorithm to read and build a model to identify whether it’s a cat or a dog but here we provide labeled data i.e. we provide pictures with classification i.e. whether it is a picture of a cat or a dog.
Here the data is labeled to tell the Machine Learning algorithm what patterns it should look for in a cat or in a dog. Once the model is formed with labeled training data new picture of cats and dogs can be fed to the model to understand the correctness of the model.
Unsupervised Learning
In unsupervised learning, data is not labeled i.e. model is allowed to discover patterns on its own. Machine Learning algorithm has to on its own look for patterns and based on these patterns group/classify data provided. Unsupervised learning algorithms are more complex as compared to supervised learning algorithms as there is no information in the data provided and so the algorithm is also not aware of the outcome to be provided.
Unsupervised learning can be used to identify patterns in data which is not known to humans as well. Also, it is easier to get unlabeled data as compared to labeled data as labeling data involved extra work.
Reinforcement Learning
Reinforcement learning is totally different when compared to Supervised and Unsupervised learning. Reinforcement learning is a learning method in which it learns by trial and error i.e. program interacts with a dynamic environment to perform a certain task and in return discovers feedback (error or rewards). This method allows machine & software agents to perform lots of tasks to determine ideal behaviour within a given context by providing feedback for each task performed. Here the feedback is a positive or negative signal that allows the algorithm to relate correct action to positive signal and wrong action to negative signal. We can reinforce our algorithm to prefer a positive signal over a negative signal.
Over time learning algorithm gets trained for the positive signal and is able to automatically determine the ideal behaviour within a specific context in order to maximize its performance.
Implement ML.NET – Machine Learning with .NET Core
Let’s see how to use ML.NET (Machine Learning with .NET Core) Model builder to train and use your first machine learning model with ML.NET. We will be learning how to configure Machine Learning with labelled data to identify the sentiment (positive or negative) from the text that represents the review of a restaurant.
Prerequisites
Visual Studio 2019 16.6.1 or later
Download & Install
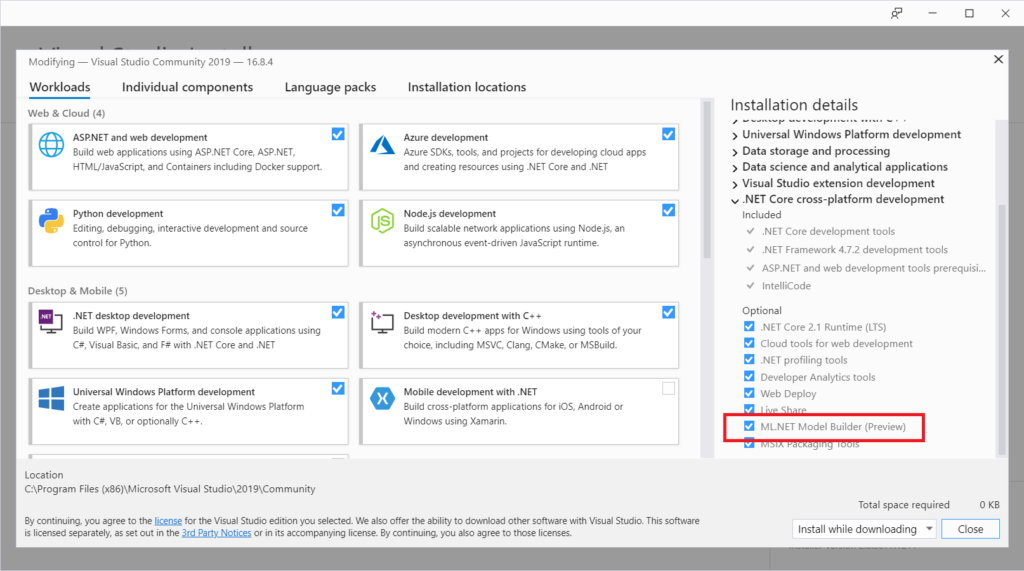
Model Builder ships with Visual Studio version 16.6.1 and later versions. Check that optional ML.NET Model Builder Preview is installed as shown below
Enable ML.NET Preview Feature
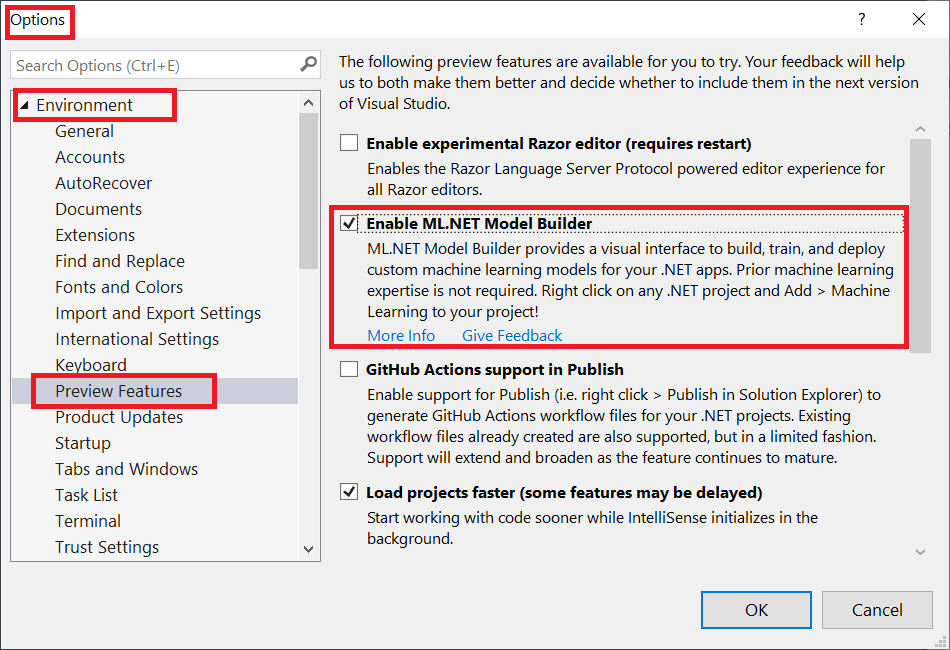
ML.NET is currently a preview feature so you need to enable that in Visual Studio, go to Tools > Options > Environment > Preview Features as shown below
Download Sample Data
For demo purposes download the labeled data Sentiment Labeled Sentences Dataset from the UCI Machine learning repository. Unzip the download zip file and save the yelp_labelled.txt file to the project directory.
Each row in yelp_labelled.txt represents a different review of a restaurant left by a user on Yelp. The first column represents the comment of the user, and the second column represents the sentiment of the text (0 is negative, 1 is positive).
Create .NET Core Console Application
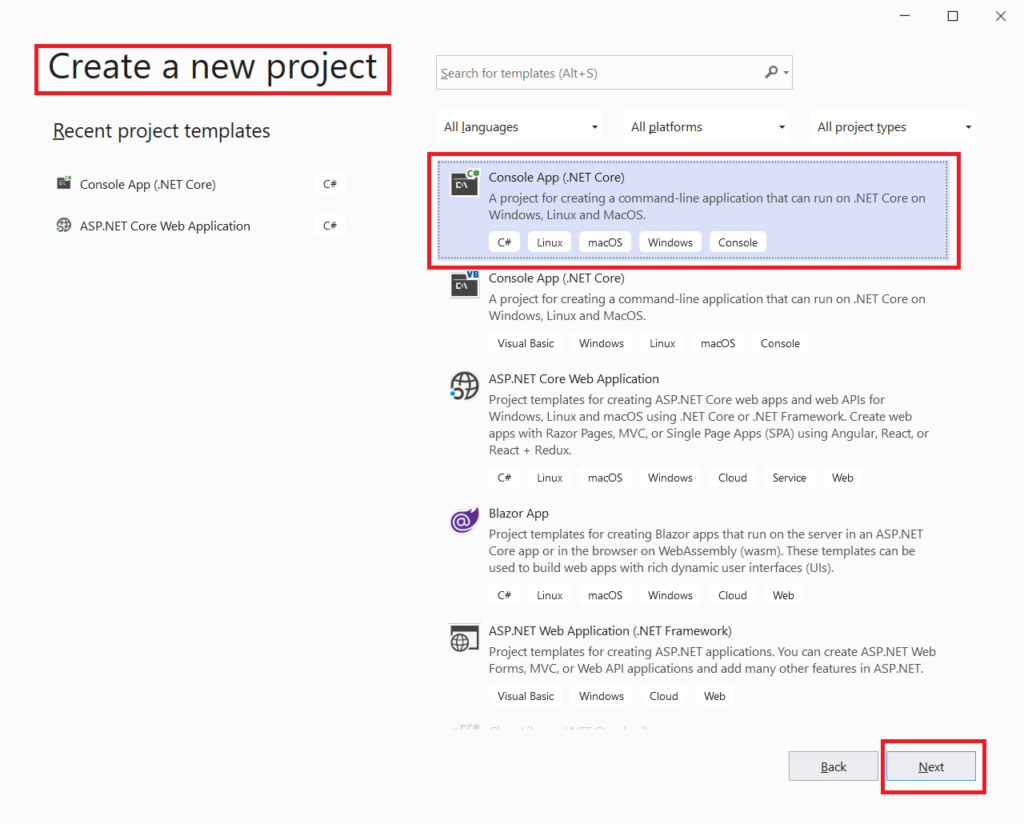
Using visual studio create new project option create .NET Core console application with template C# Console App (.NET Core) as shown below
Enable Machine Learning in the project
Add Machine Learning to the project
In solution explorer right click on the project and select Add->Machine Learning as shown below
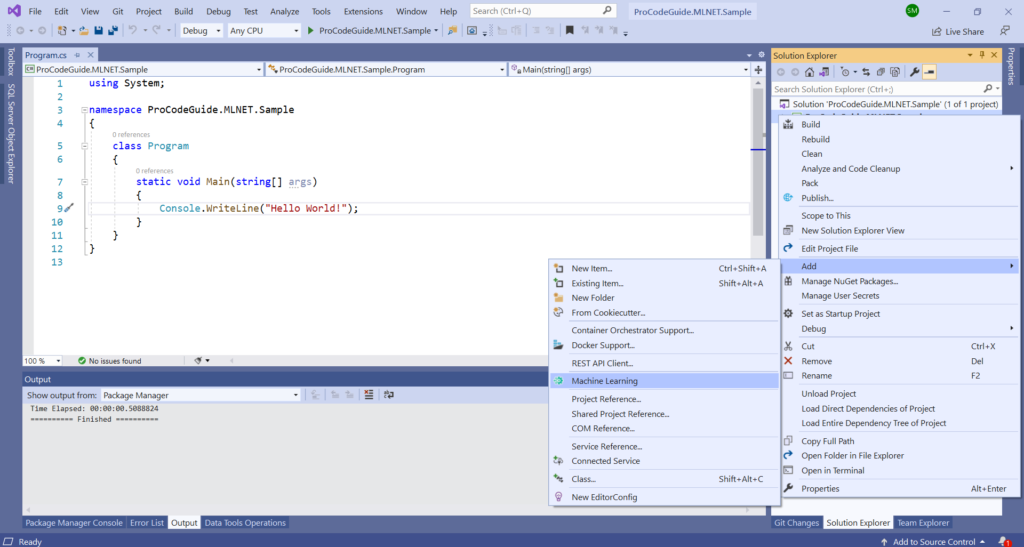
This will open the ML.NET Model builder in Visual Studio as shown below.
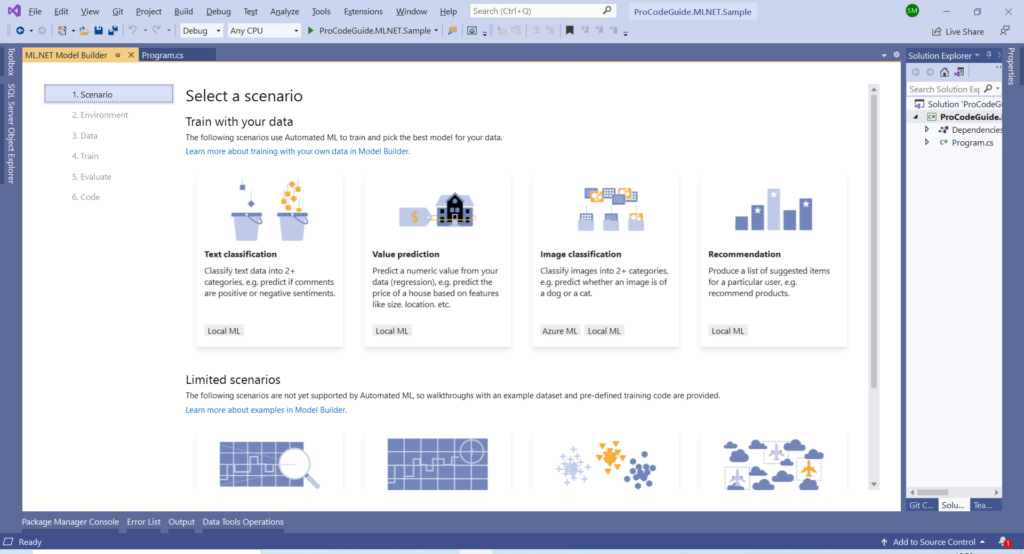
Pick a Scenario in Model Builder
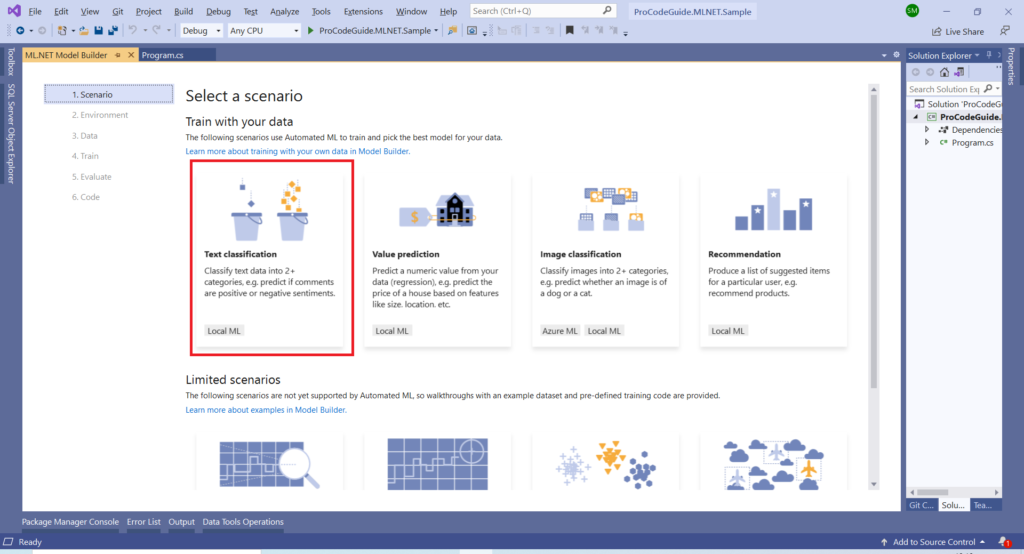
For demonstration purpose, we will select Text Classification (since we have selected comment for sentiment prediction as positive or negative) In the Model builder window as shown below
Select Environment in Model Builder
Once the scenario is decided it will take you to pick an environment screen as shown below.
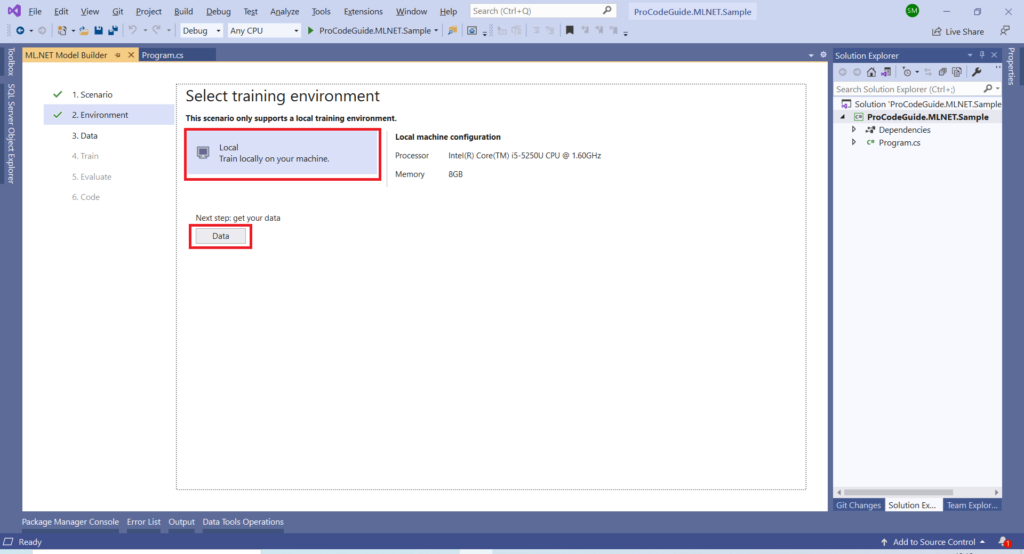
Make your choices for an environment and click on the data button. Here only available option (some scenarios do support training in Azure) i.e. Local option has been selected for the environment i.e. train locally on the machine.
Add Data in Model Builder
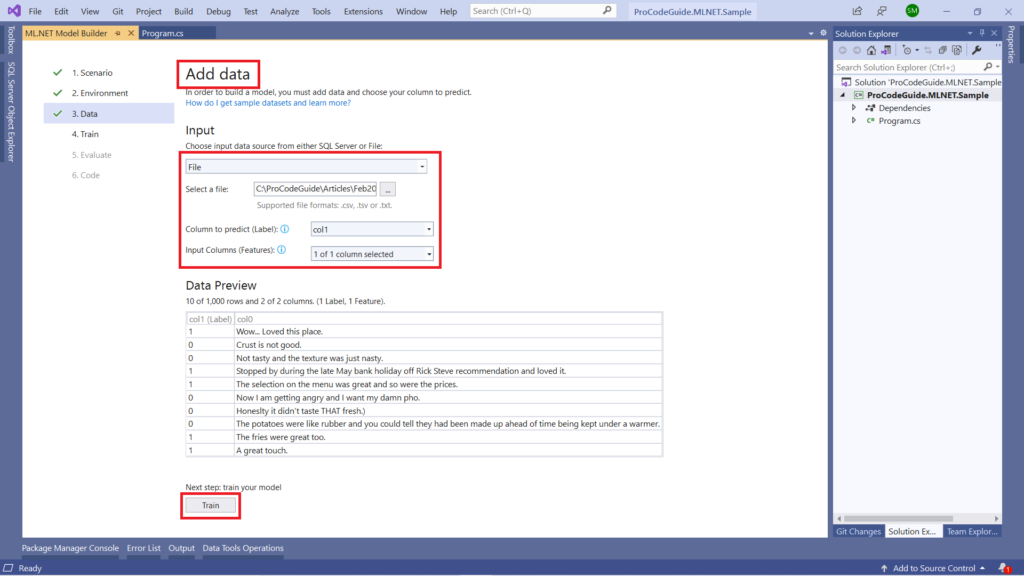
After clicking on the data button below screen will be displayed. On this screen for Add data make following choices
- Select ‘File’ for the data source (SQL Server is also available as an option)
- Select yelp_labelled.txt, which was downloaded for demo sample data, in select a file dialog box.
- Since column 2 in the data file contains the prediction data so we have selected col1 (indexed 0) for the column to be predicted (label)
- All of the columns in the dataset besides the Label are automatically selected as Features. Here col0 is already selected for the input column as that contains our input text for analysis.
Once all the selection has been done then click on the Train button on Add data screen.
Train Model in Model Builder
Here model will be trained based on data in the yelp_labelled.txt file. Leave the time to train as it is and click on the Start training button which will initiate the training of the model
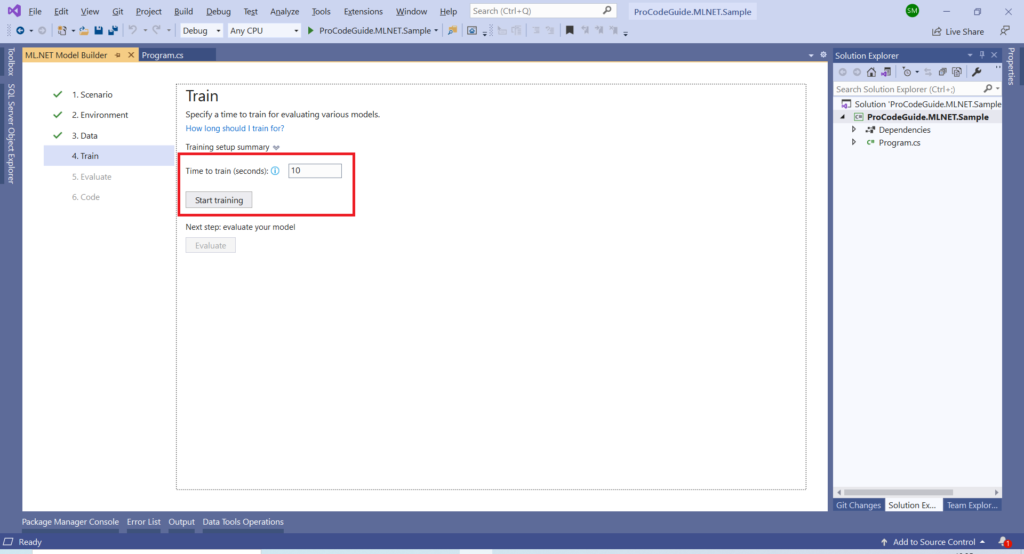
Once training of the model is done for the selected time it will display the training results as shown below
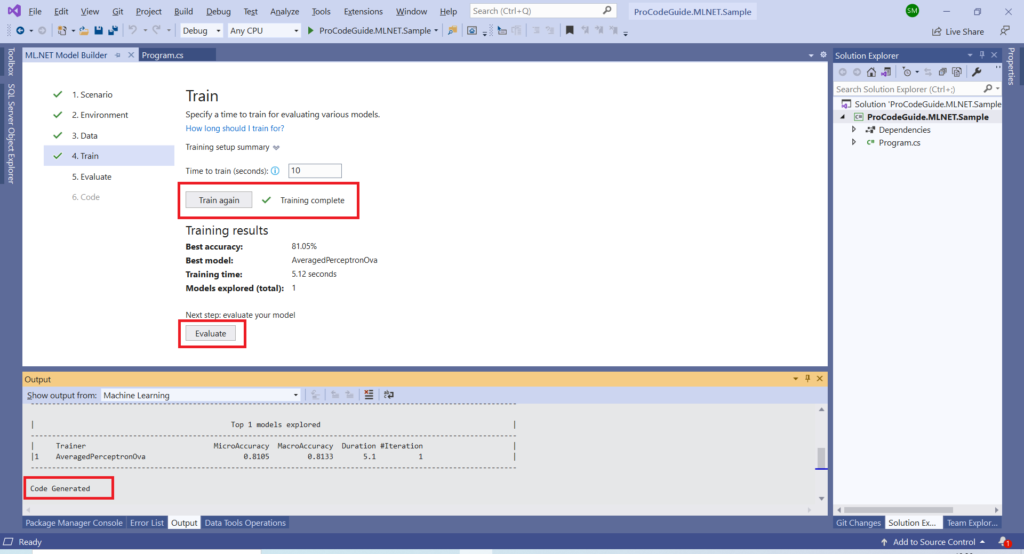
Evaluate button on the above screen can be used to evaluate the model which has been trained by the Model builder
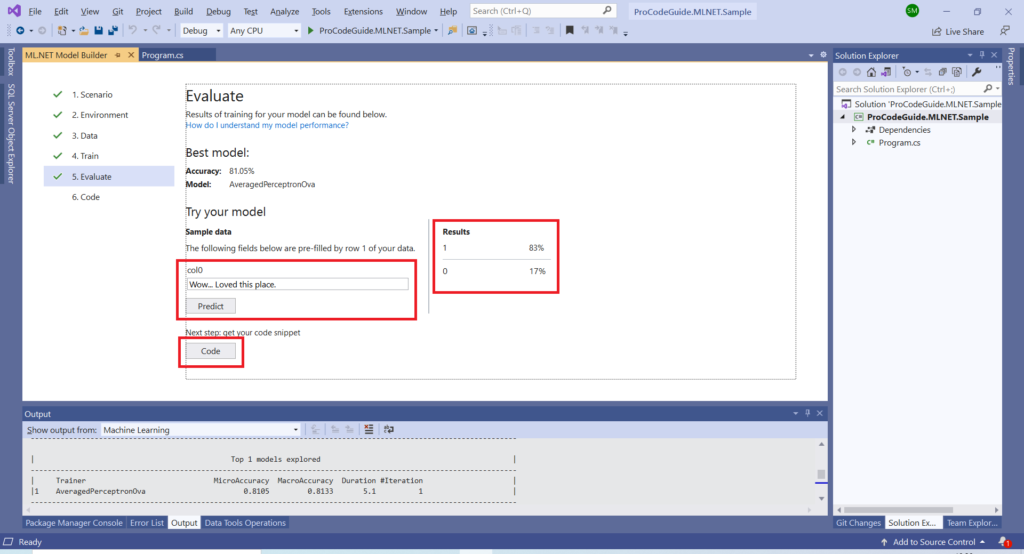
Evaluate your Model in Model Builder
You can enter your value for col0 i.e. text and click on predict button to check if the prediction made by the model is correct or not. Once you are done evaluating the model click on the Code button.
Generate Code in Model Builder
Click on Add Projects button in the code screen as shown below
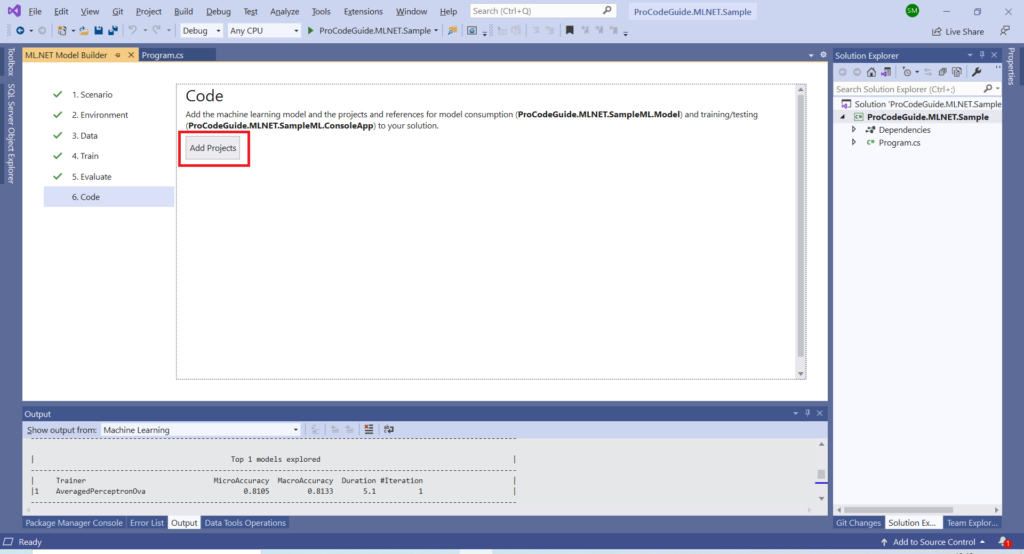
Clicking on Add Projects will enable the Model builder to add a couple of projects to the solution i.e. Model project & project for training & consuming the model as shown below
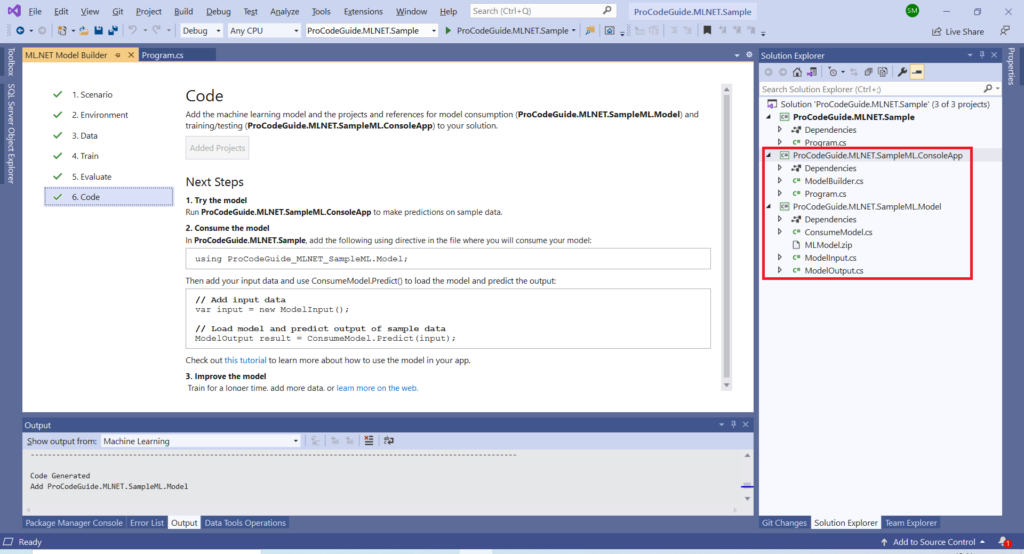
Let’s Run the program and predict results
Before running add the below code to your Main method in the program.cs file of your .NET Core Console App
class Program
{
    static void Main(string[] args)
    {
        // Add input data
        var input = new ModelInput()
        {
            Col0 = "Awful....Service was not Good."
        };

        // Load model and predict output of sample data
        ModelOutput result = ConsumeModel.Predict(input);
        // If Prediction is 1, sentiment is "Positive"; otherwise, sentiment is "Negative"
        string sentiment = result.Prediction == "1" ? "Positive" : "Negative";
        Console.WriteLine($"Text: {input.Col0}\nSentiment: {sentiment}");
    }
}
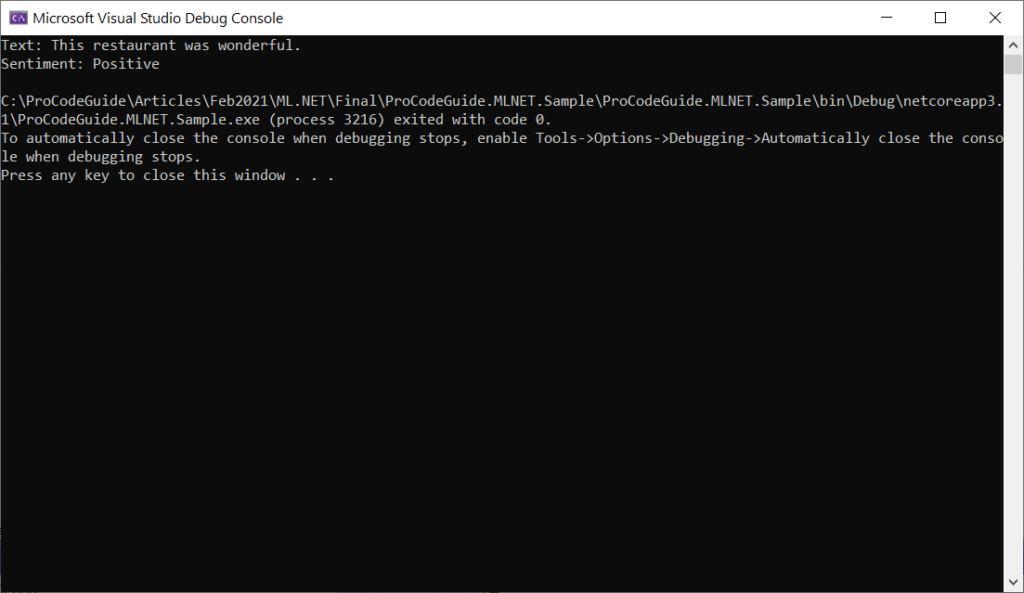
Running the code with the text “Thir restaurant was wonderful” predicts Positive sentiment
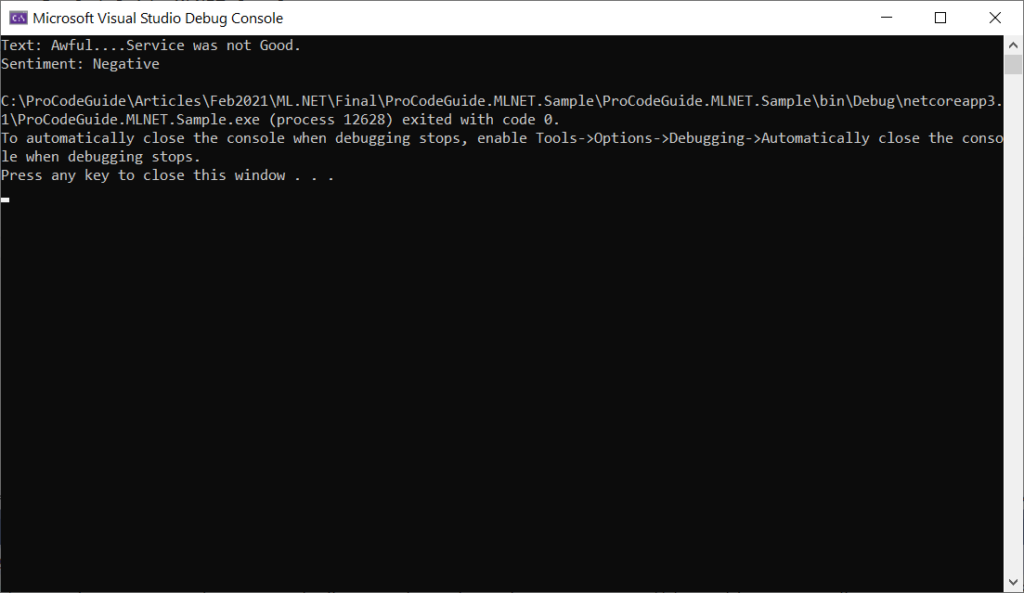
Running the code with the text “Awful….Service was not Good” predicts Negative sentiment
You can try the results with your own text and evaluate the model.
Summary
In this article, we saw how to using ML.NET to implement Machine Learning with .NET Core. We also saw an example of how to use Model Builder for the classification of sentiments as positive or negative.
Do keep in mind that this is just a basic model for demonstration purposes only and during your evaluation, there might be cases in which this model might not predict correctly with confidence. This is a preview version of ML.NET yet powerful so use it as per your needs.
Download Source Code
https://github.com/procodeguide/ProCodeGuide.MLNET.SampleApp
You can also check my series about ASP.NET Core Security
Hope you found this article useful. Please support the Author


