In this article, we will learn about how to install Python with Visual Studio Code as IDE. We will start from scratch to set up an environment for Python programming so that we are able to write, compile, debug & run Python programs on Windows Machine. We will be learning to code & run Python programs with Visual Studio Code as IDE which is totally free for use from Microsoft.
This is the second article in the Series: Python Tutorial – Learn Python Programming for Beginners
Visual Studio Code is a lightweight but powerful source code editor which runs on your desktop and is available for Windows, macOS and Linux. It comes with built-in support for JavaScript, TypeScript and Node.js and has a rich ecosystem of extensions for other languages (such as C++, C#, Java, Python, PHP, Go) and runtimes (such as .NET and Unity).
Table of Contents
Steps to Setup Environment for Python Programming with Visual Studio Code IDE
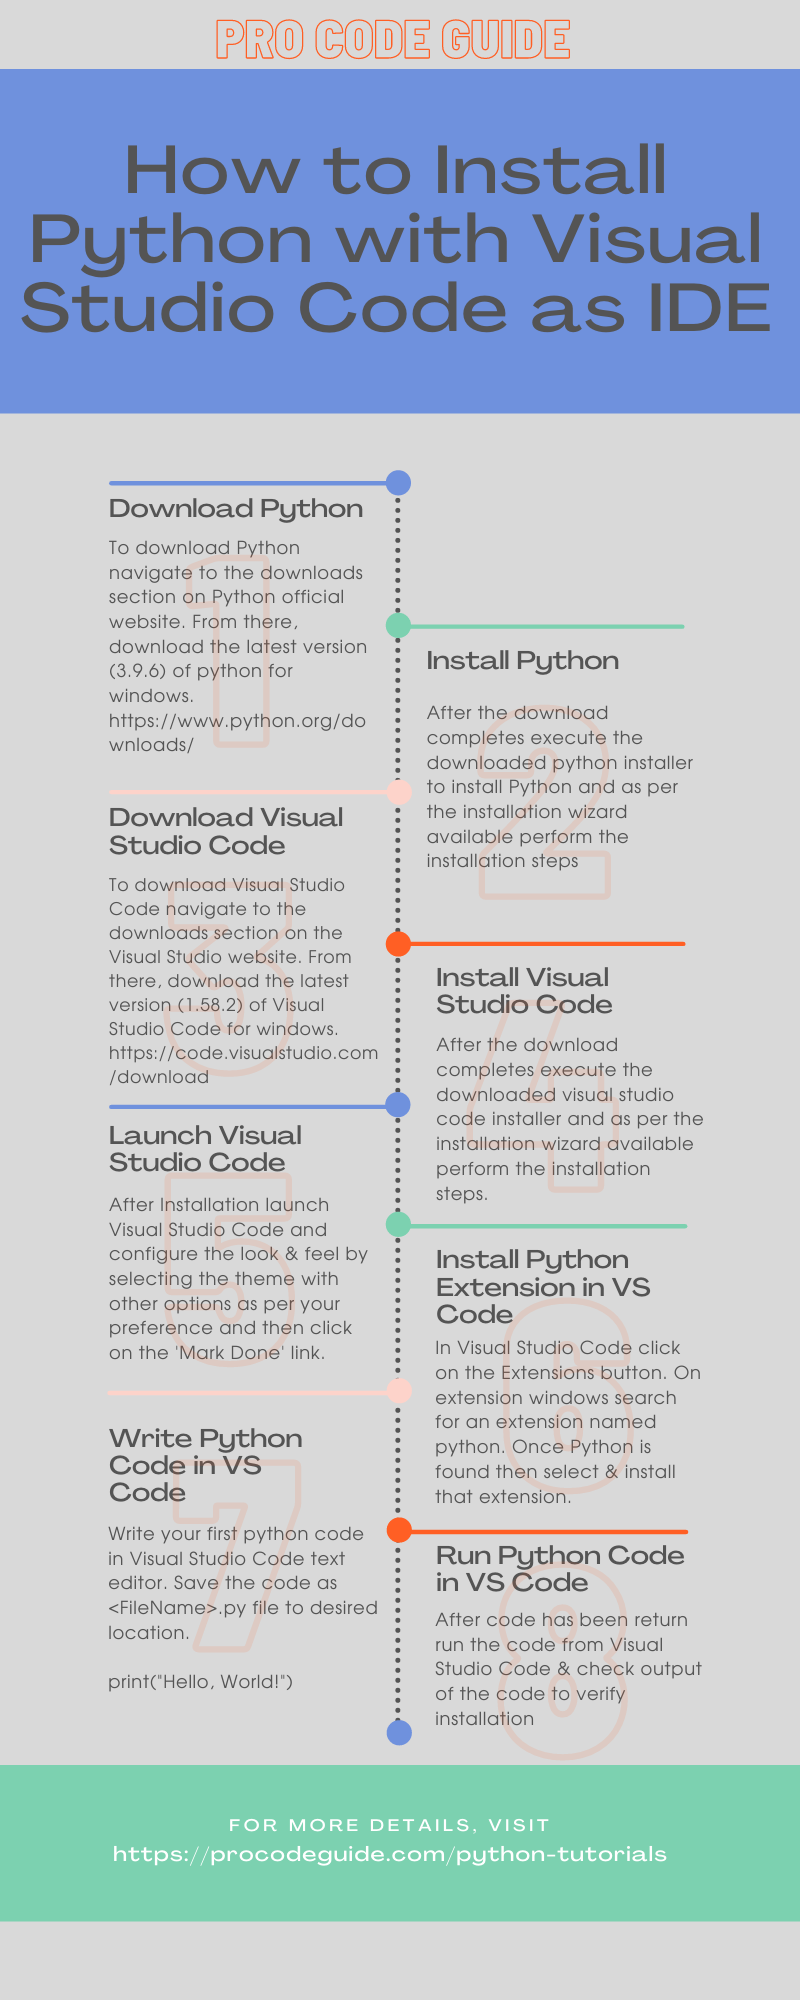
Here is the complete process to download the latest versions of Python & visual studio code to install python & visual studio code and install extensions for python development in visual studio code on Windows Machine. I am running Windows 10 on my machine for all the demonstrations.
Download & Install Python
What we will need is a Python runtime environment on the windows machine to be able to compile & run Python source code. We will have to install Python for the Python runtime environment.
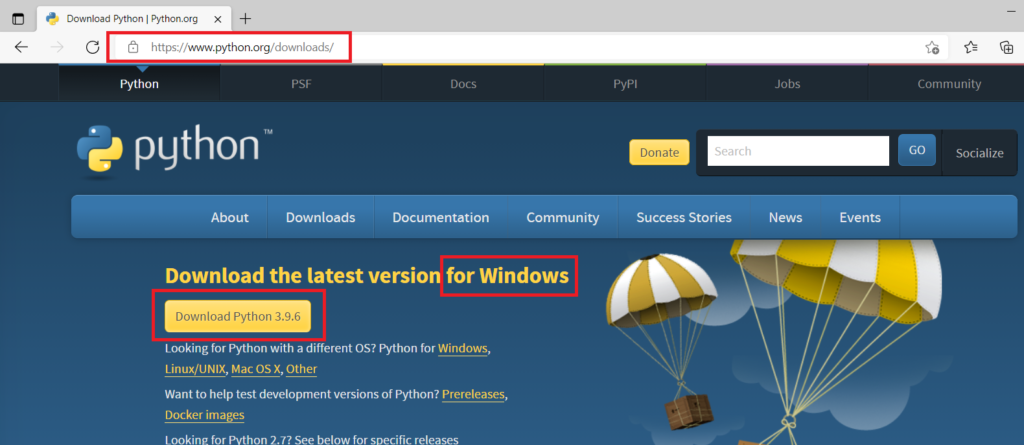
To download Python we will navigate to the downloads section on Python official website. From this link here, we will download the latest version (3.9.6) of python for windows.
After the download completes we will execute the downloaded python installer to install Python and as per the installation wizard available will perform the installation steps as shown below.
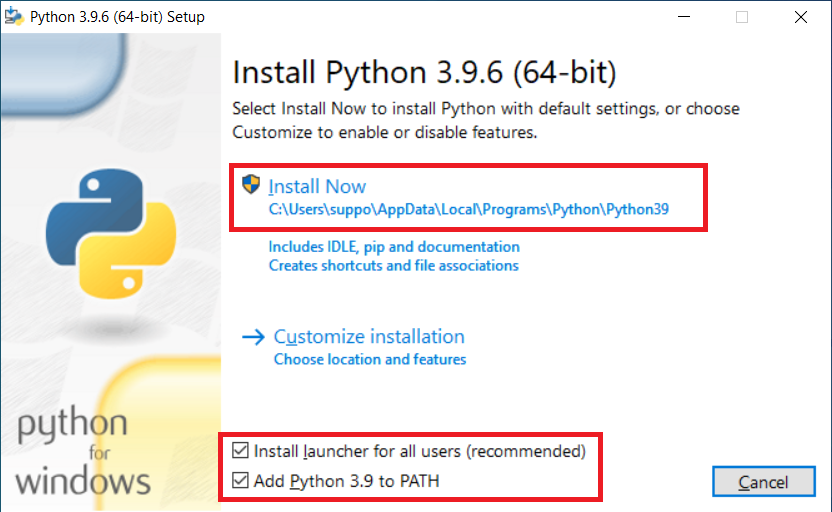
Step 1 – This is the initial screen after launching the setup program where you can configure options like custom location & feature. I selected the default options for installation except I chose to ‘Add Python 3.9 to PATH’ which will add details to environment variables in Windows. By adding the PATH of python to the environment variable I will be able to access the Python environment from any folder without the need to specify the fully qualified path to Python runtime.
Finally, click on ‘Install Now’ for installation to begin the installation
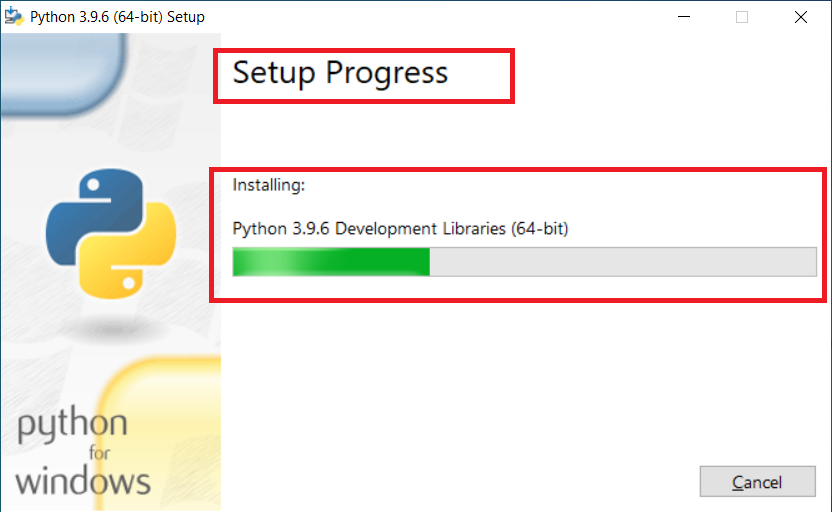
Step 2 – After selecting Install now progress will be displayed as shown below
Step 3 – On successful completion of Python installation, this screen will be displayed. Here you will have the option to disable the path length limit of 260 characters for MAX_PATH. This change will allow Python to use long path names. I chose this option & recommend you all to do the same for compatibility with sources from a Linux environment where the path length isn’t an issue.

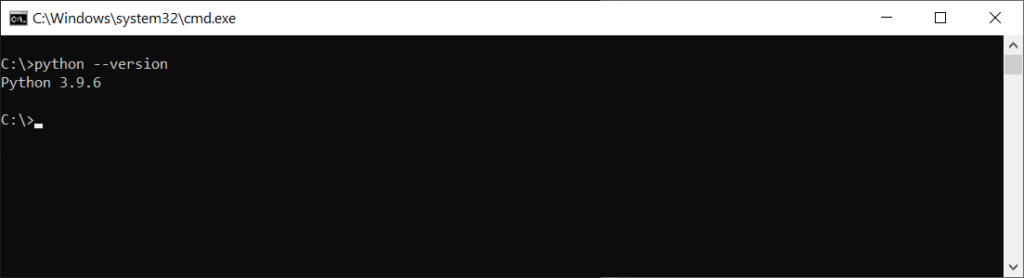
Step 4 – Verify your Python installation by running the Python version command (python –version) from the command prompt window. If Python is successfully installed on the machine then this command in output will return the version number of the python runtime installed on the machine. i.e. in our case, this should return 3.9.6 as shown below
Now that Python installation has been completed and verified we can now go ahead install Visual Studio Code which we will be using as IDE for Python Programming.
Download & Install Visual Studio Code
To download Visual Studio Code we will navigate to the downloads section on the Visual Studio website. From this link here, we will download the latest version (1.58.2) of Visual Studio Code for windows.

After the download completes we will execute the downloaded visual studio code installer and as per the installation wizard available will perform the installation steps as shown below.
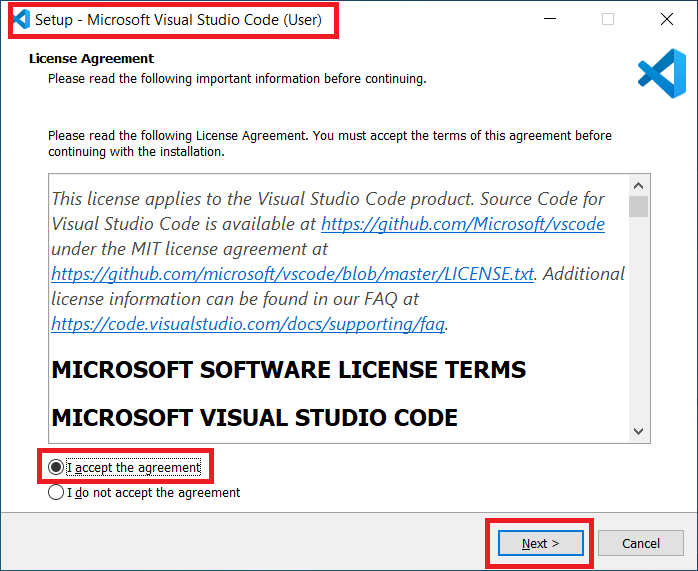
Step 1 – This is the initial screen after launching the setup program where you need to read/accept the license agreement and then click on the next button.
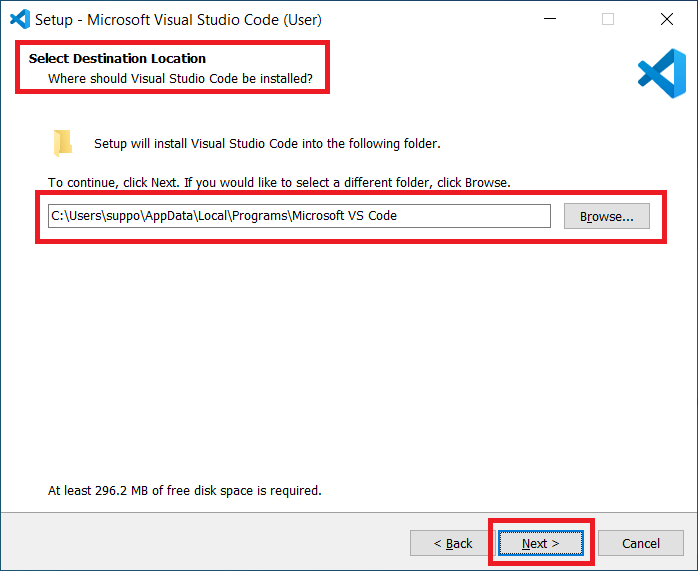
Step 2 – This is the screen for selecting the destination location for the install. By default, a path on the local drive will be selected that if required can be overwritten. I recommend leaving the default path as it is and click on the next button.
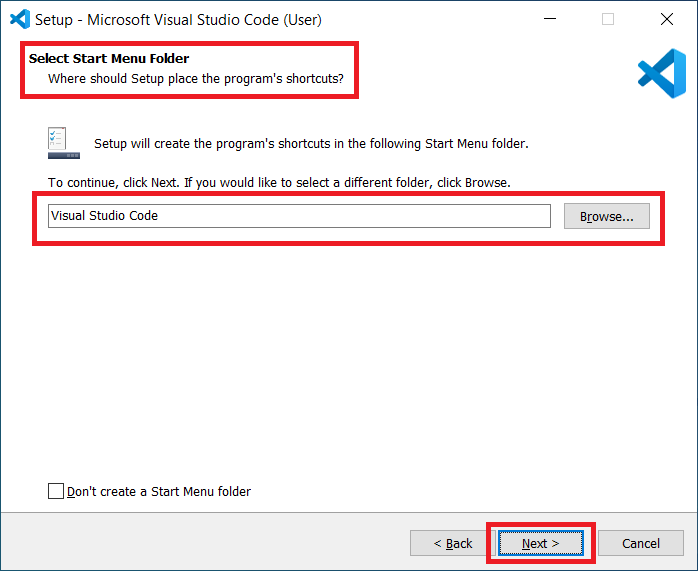
Step 3 – Here you can specify a name for Windows Start Menu Folder. This name will be used to display shortcuts under Start Menu. By default, a name will be specified that if required can be overwritten. I recommend leaving the default name as it is and click on the next button.
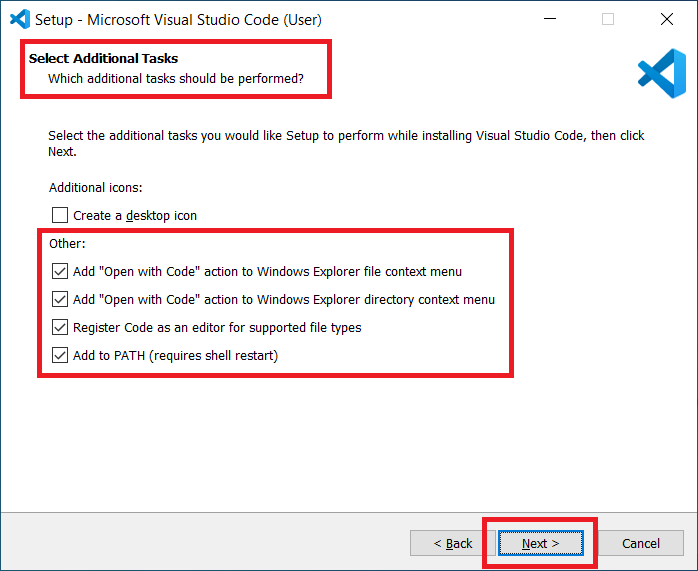
Step 4 – On this screen, there are additional options using which Visual Studio Code can be integrated with Windows Context Menu, can be set as the default editor for supported file types, can be added to PATH environment variable for global access & desktop shortcut icon of visual studio code can be created for easy access.
I prefer to integrate visual studio code with the context menu, register as the default editor for supported file types & add to the PATH environment variable as shown below. Please select the preferred options and click on the Next button.
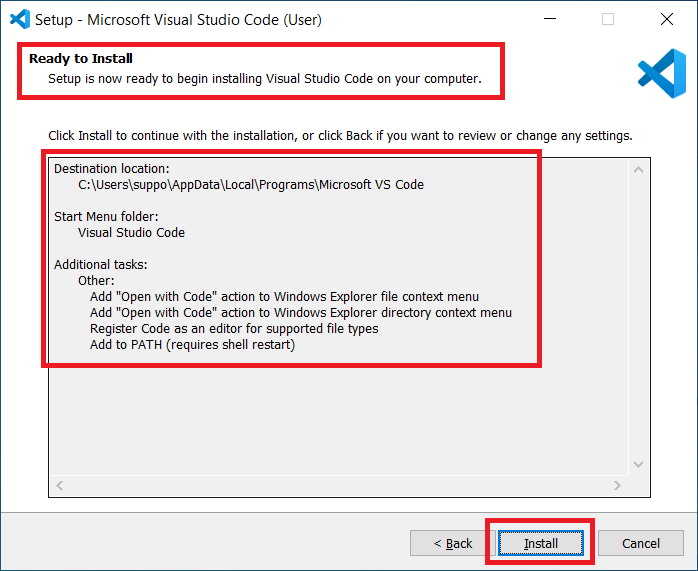
Step 5 – Ready to install screen will display the summary of options selected on previous screens. You can review the information and then click on the Install button. This is the last chance to change anything so if required you can use the back button to change options specified on previous screens.
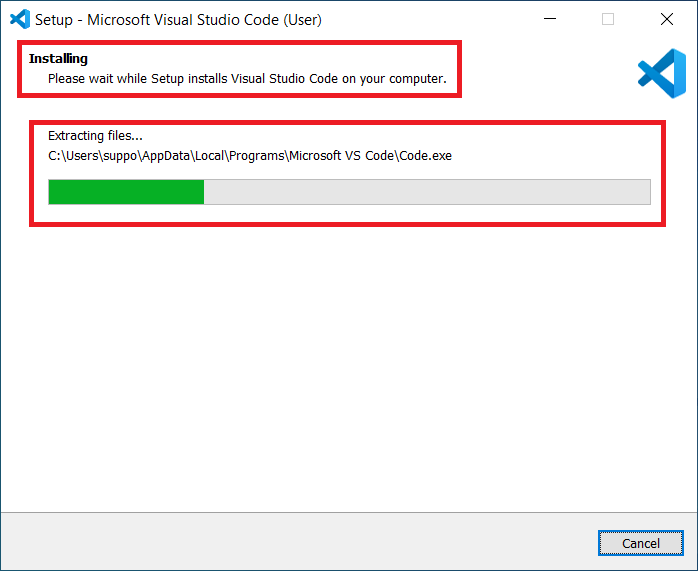
Step 6 – This screen displays progress details of installation i.e. it shows the task being performed currently by the installation process.
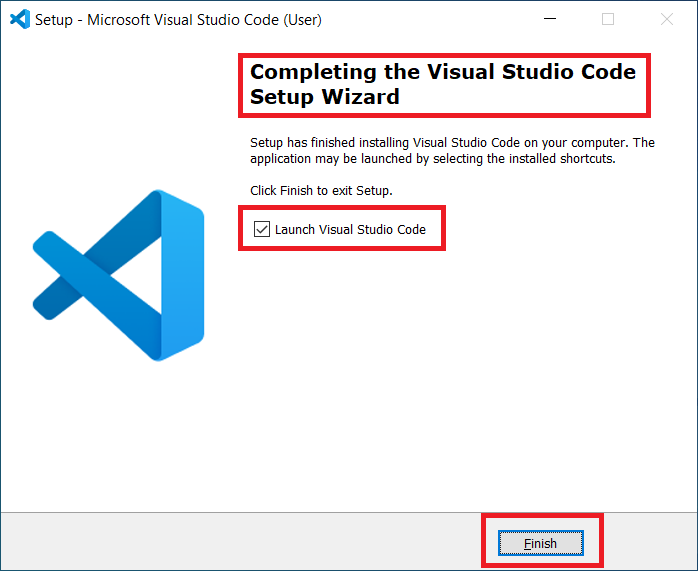
Step 7 – On successful installation of Visual Studio Code below screen will be displayed. Where you can either select to Launch Visual Studio as setup finishes or launch it later from Startup Menu as per your preference. Click on the Finish button to end the installation process.
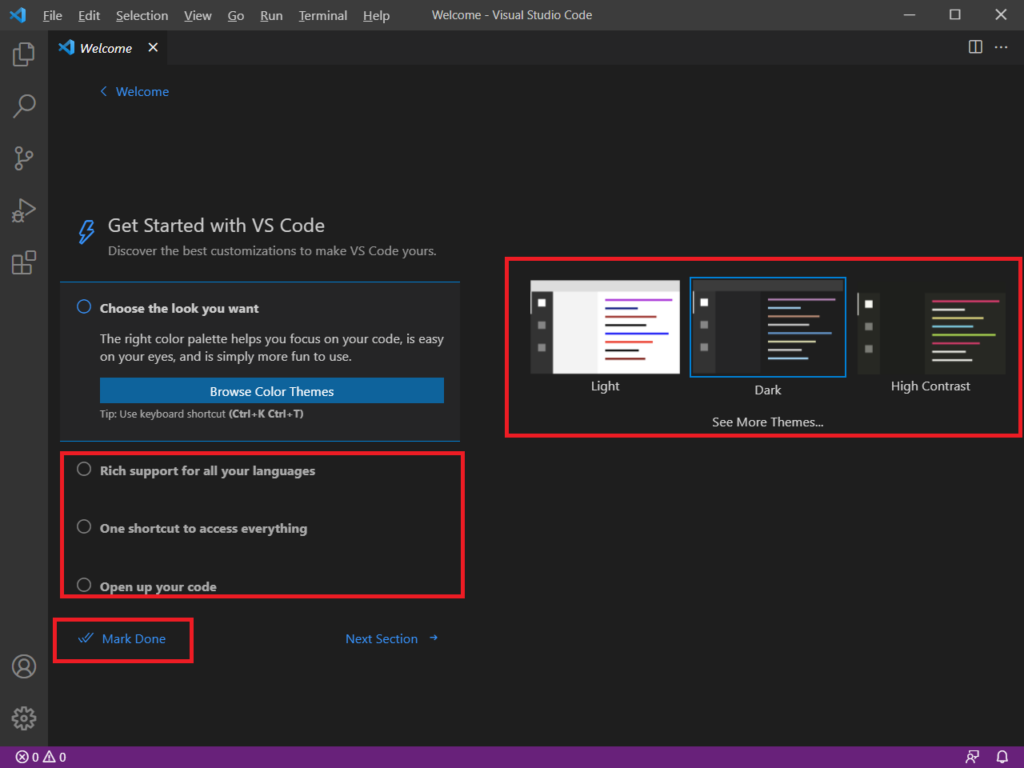
Step 8 – After the installation is successful, you can see Visual Studio Code is started, it will look like the below screen when you run it for the first time on that Machine. You can configure the look & feel by selecting the theme with other options as per your preference and then click on the Mark Done link.
So far we have looked at how to install Python and Visual Studio Code on a windows machine. When you install Visual Studio Code then by default there is no support for Python Programming except that using it as a text editor you can write Python code in it. But if you need to compile & run this Python code then you will have to do it using Command Prompt Python tools.
Now let’s see how to configure Visual Studio Code to use it as IDE for Python. i.e. We should be able to write, compile, debug & run Python code from Visual Studio Code.
Configure Visual Studio Code as IDE for Python
Here are the steps to configure Visual Studio Code as IDE for Python.
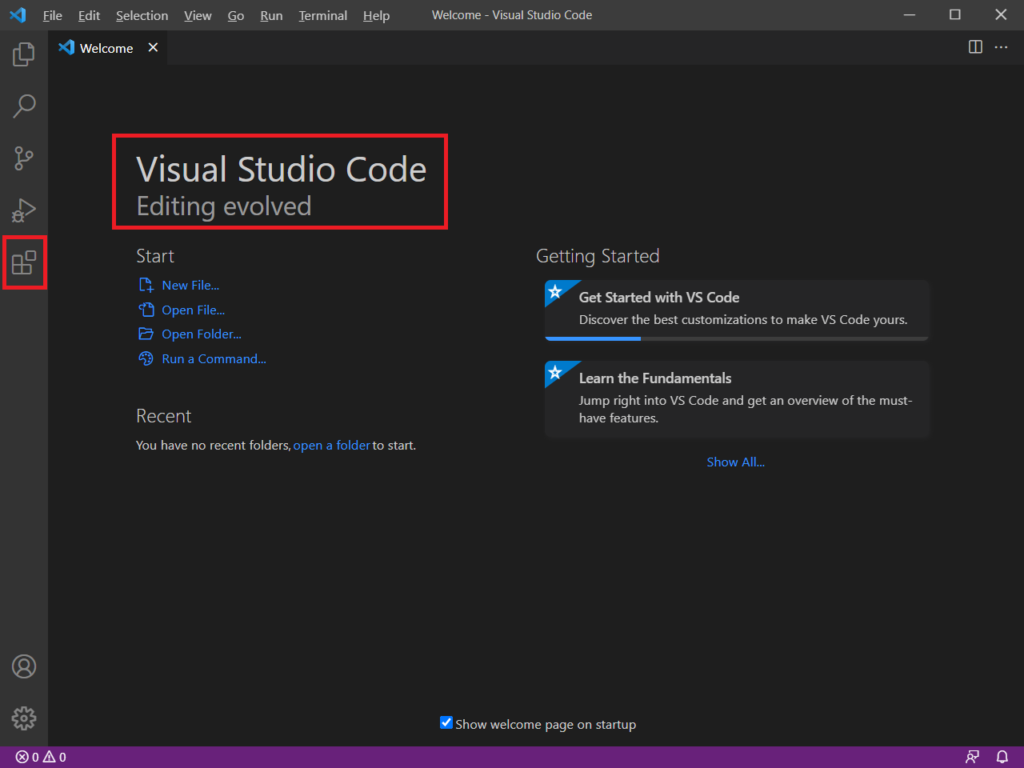
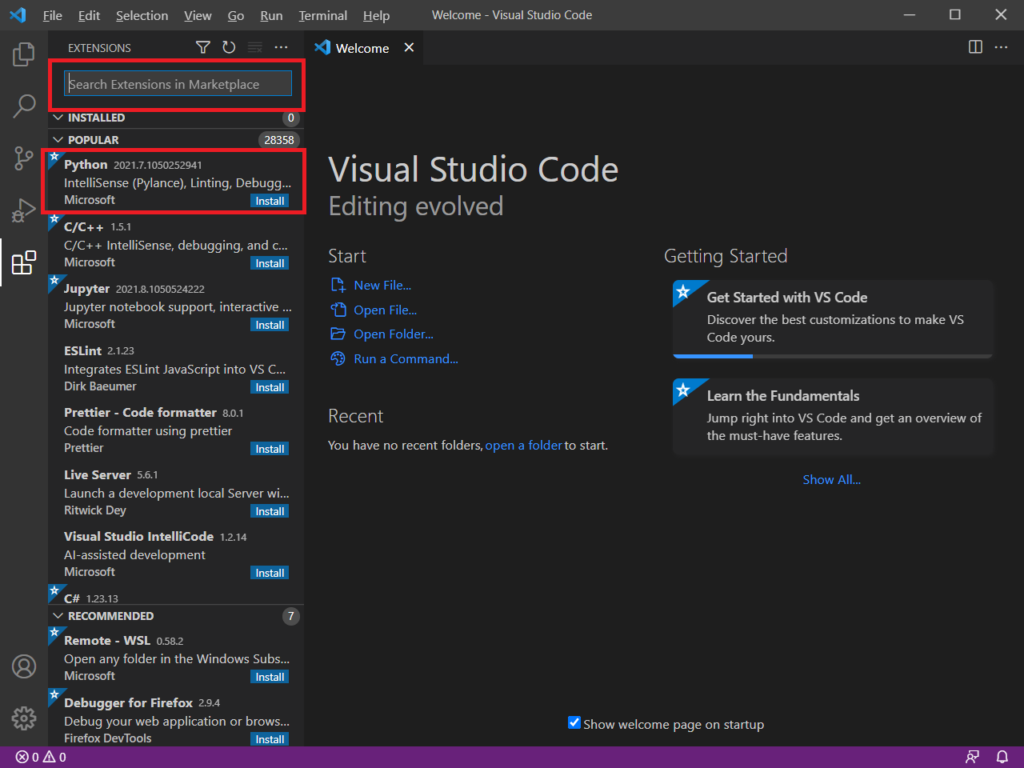
Step 1 – Launch Visual Studio Code and click on the Extensions button which is highlighted on the screen below.
Step 2 – On extension windows as shown below search for an extension named python in the search text box. Here already Python extension is shown under the popular tab look like it is very popular in extensions in visual studio code. Select extension Python.
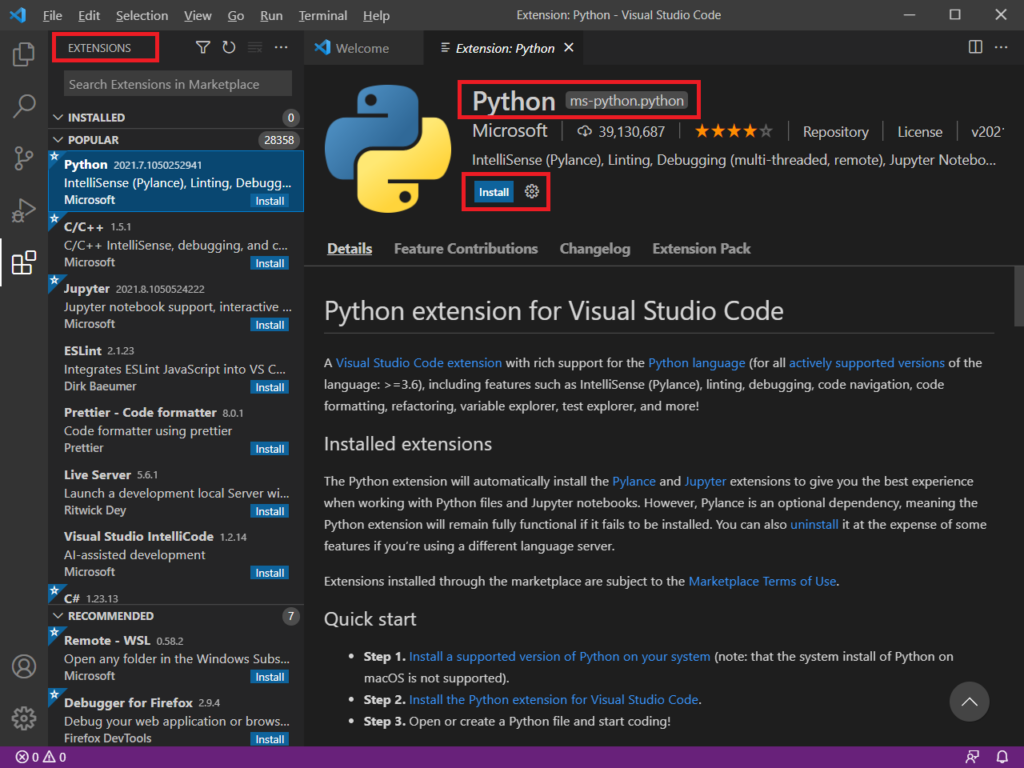
Step 3 – On selecting extension Python below screen with details of Python extension will be displayed. In that detailed window click on the Install button to add Python support to visual studio code. Installing Python extension will also install one more extension ‘Pylance’ implicitly.
Step 4 – Write the first python code and run that to verify if installation\configuration of Python and Visual Studio Code is successful or now. Below is the screen which shows the source code & output for the Hello World program in Python with Visual Studio Code.
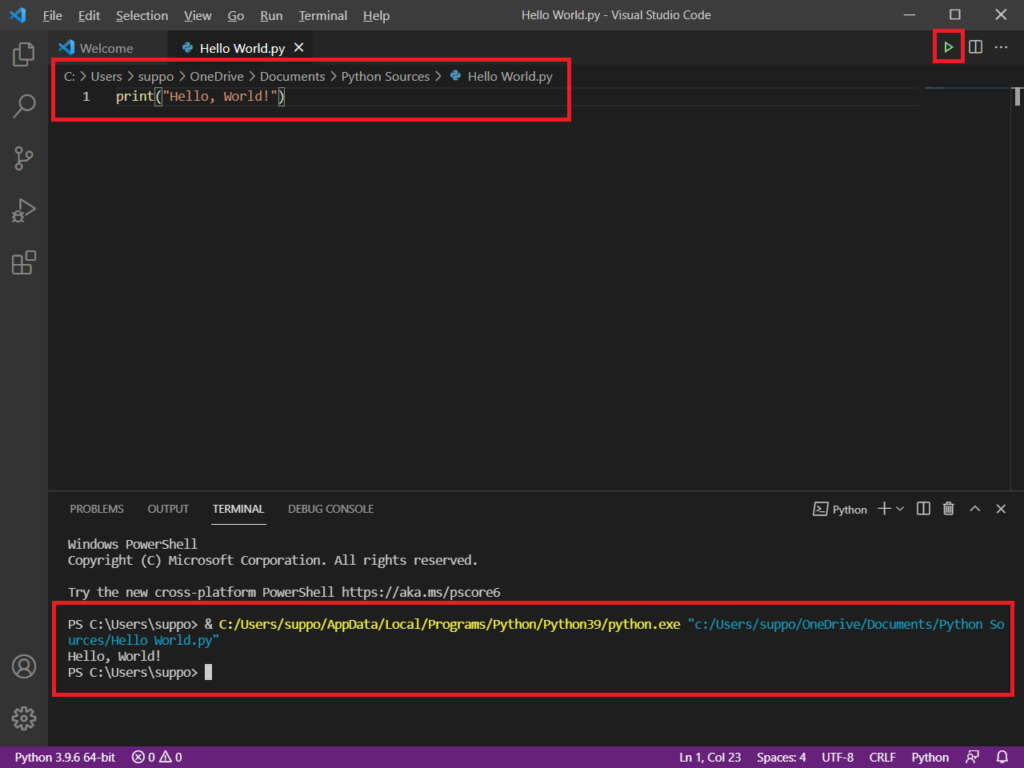
So above screen shows that our installation & configuration was successful as we are able to write and run Python code in Visual Studio Code.
Following features are supported by Visual Studio Code for Python Programming
- Intellisense – IntelliSense allow text editor to show methods, class members, and documentation as you type. The Python extension supports IntelliSense using the currently selected interpreter.
- Debugging – Now you can set breakpoints, inspect data, and use the debug console as you run your Python program step by step. Visual Studio Code makes it possible to debug a number of different types of Python applications, including multi-threaded, web, and remote applications.
- Git Integration – Visual Studio Code ships with support for Git and GitHub right out of the box.
Summary
In this article, we learned about how to download & install Python, download & install Visual Studio Code and how to configure Visual Studio Code for development with Python.
Visual Studio Code is one of the most powerful & coolest text editors with many extensions that can be installed to enhance the features of Visual Studio Code. This makes Visual Studio Code a good choice for Python development as Python extension makes it possible to write, compile, debug & run python code in Visual Studio Code.
In our next article, we will look at basic programming concepts in the Python programming language.
Please provide your suggestions & questions in the comments section below
References – Microsoft Visual Studio Code
Hope you found this article useful. Please support the Author